War Devices
From GMod Wiki
Introduction
Various destructive devices can be made thanks to the advanced physics engine Garry's mod allows players to take advantage of. The simplest, and most popular, designs usually are variations on cannon and catapult designs. Some tips and instructions for building war machines are below. In order to best utilize these, it's good to have knowledge of the weld, axis, hydraulic, and No Collide tools be aware that mingebags will use these too and if you use these on most servers you will get banned for killing .
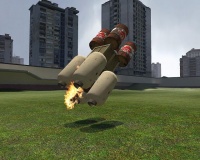
Flaming Explosive Barrel Cannon
| War Devices: Flaming Explosive Barrel Cannon |
| A cannon that is simple and easy to build, but that is also very effective. | |
| LukeGT | |
| | January 20, 2007 |
| | - |
This is surprisingly easy to make, and I'm sure you won't be displeased with the results. Let's begin!
NOTE: You will need to have the Phoenix model pack, available for download here: http://forums.facepunchstudios.com/showthread.php?t=277649 . If you don't want to install that, then you can skip steps 1 & 2 and instead make your own creative design for a cannon.
Construction
|
  |
Using the cannon
NOTE:Make sure you don't press TOO fast, otherwise barrels will accumulate within the cannon, causing a massive explosion, which you may or may not want. To avoid this, you may increase the Delay setting for the turret. |
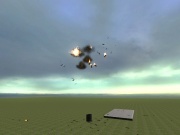 |
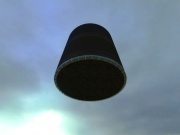
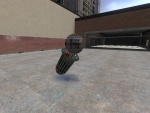
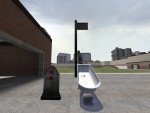
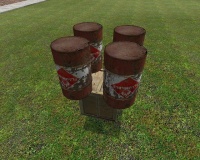
Trash can cannon
| War Devices: Trash can cannon |
| Simple cannon made from dynamite and a trash can. | |
| Pyroguy | |
| | 12/1/06 |
| | - |
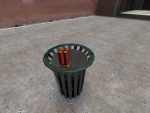
This is one of the simplest cannons you can build. It isn't very impressive, but it is reliable and easy to construct.
Construction
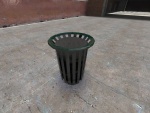
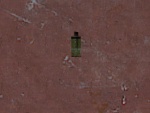
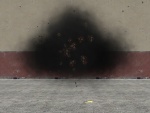
- Spawn a Trash Can prop with NO lid (it is circular and green, and has a hole in the middle).
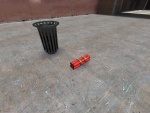
- Spawn a single pack of dynamite, with no fuse or repeating time.
- Pick up the can and freeze it in the air, above your head.
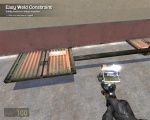
- Take out the Easy Weld tool, and easy weld the dynamite to the bottom of the trash can.
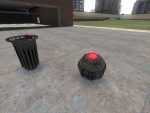
- Spawn any spherical object (bowling balls; copter bombs; or, if you really want some fun, an AI enabled roller mine).
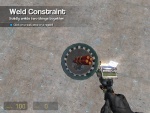
- Put the desired projectile on top of the trash bin and (using the Weld tool) weld it to the cannon WITH a force limit (400 should work fine). This allows the projectile to break off when fired, but keeps it attached during moving and aiming.
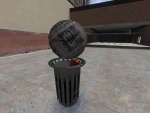
- Aim the cannon by picking it up and rotating it with the Phys Gun. Then, stand back, and trigger your dynamite. You can repeat steps 5-7 to reload the cannon.
(NOTE: The pictures are slightly obsolete because I typed this tutorial up from a GMod 9 version. The dynamite is unfortunately too big to fit inside the can correctly, so you have to weld it to the underside).
Images
 |  |  |  |
 |  |  |
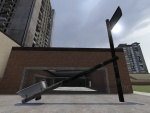
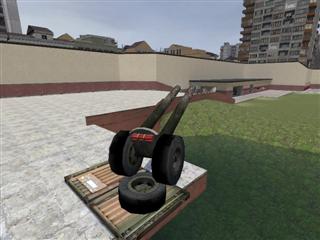
Concrete Barrel Cannon
| War Devices: Concrete Barrel Cannon |
| Cannon made from a concrete pipe and dynamite. | |
| Meatwad | |
| | Unspecified |
| | - |
Construction
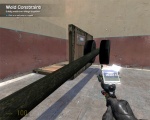
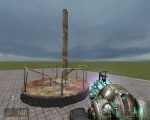
- Easy weld the blast door to the wall.
- Using the Axis tool, select the direct middle of the wheel and place it on the blast door. Freeze it.
- Using the Easy Weld tool, weld the steel beam to the wheel. (Top right angle of the wheel. Recommend using No clip for this. Freeze it.
- After doing that, Weld the wheel, blast door, and the steel beam together at least 6 or 7 times.
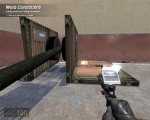
- Now, Easy Weld the dumpster's top right part to the end of the steel beam. Make sure that the top of the dumpster is the open part and is not conflicting with the wall. In other words, make it perfect.
- Now, the metal pole, Easy Weld it in front of the catapult onto the wall to stop the catapult so it can release it's projectile to go flying.
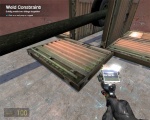
- Weld the pole to the wall about 5 times, the dumpster to the beam about 5 times, and the wheel to the beam and the blast door about 5 more times. Thus, strengthening the catapult's durability.
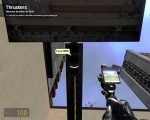
- Add Thrusters to the bottom of the steel beam and the dumpster. Make the speed about 80,000 or 8,000 which ever it is.
- Now, place a car, a ragdoll, or what ever you want, to exploding barrels and make it go flying. Remember to UNFREEZE everything.
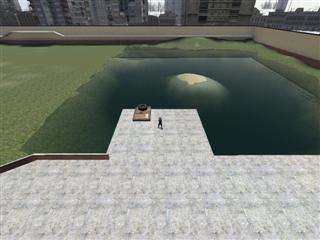
Note that objects that have sunk into the water often take up more CPU time to calculate the physics and can cause the game to start lagging a lot faster than if the objects were sitting on land
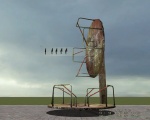
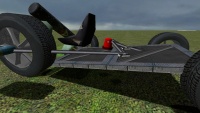
Another catapult
| War Devices: Another catapult |
| A catapult almost the same as in the screenshots for Garry's mod. | |
| Macaco | |
| | December 10, 2006 |
| | - |
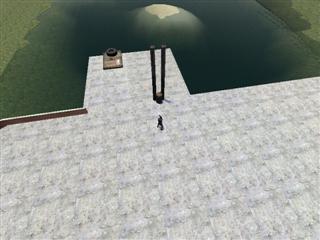
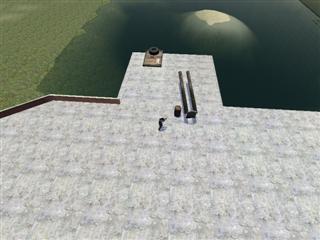
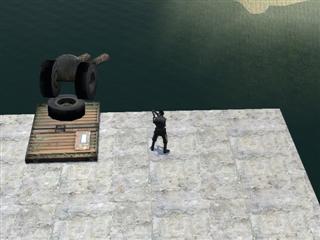
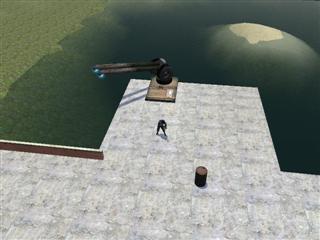
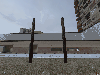
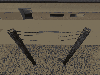
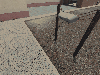
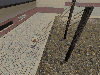
Catapult
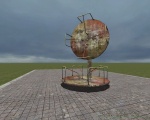
Spawn two dock poles and freeze them upright. Use the motor constraint with max torque on the bottom of one then the middle of other, then freeze whatever holds launched object onto the motorized-pole when it is in the ready-to-fire position, weld it down, unfreeze the all but the non-motorized pole, this is a very strong catapult, to make it stop midway freeze something at the top of the non-motorized pole, this is great for launching other players if they are in a pod, and you can launch yourself in a pod without help by pressing the launch button, you can scale the entire map with the right pitch
Images
Remote Base Defender Cannon
| War Devices: Remote Base Defender Cannon |
| A relatively advanced, fully remote-controllable cannon. | |
| RunsWithKnife | |
| | December 6, 2006 |
| | - |
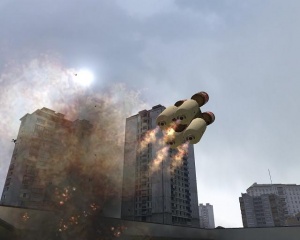
Cannons: Tubes with dynamite and garbage dropped down into them, aimed with the phys cannon, and fired. They're inspiring to watch if you've never seen a baby throw an explosive barrel before, but admit it. They're not cool enough for your fort. This is the new way to throw crap. This is the Base Defender.
Construction
Start with the largest blast door, freeze it (not weld it) to the ground. I use these little guys because it makes it easy(er) to move your cannon onto your base when you're done building it. (Or use the 'keep upright' tool on it and add wheels maybe? That'd be a tank. A Gmod tank.) Stick a wheel on it, using the '6' and '4' keys for 'forward' and 'reverse' respectively. Give it a torque of around 2000 and a friction of 2.5.
Spawn two dock poles. I use the long ones with the invisible end, but believe it or not, anything long and thin will do. Spawn a barrel to use as a reference, and weld the poles together (I weld 'em twice) leaving about 80% of the width of a barrel between them, or a bit more. Use the 'super ice' mode of the physprops tool to make the poles slippery.
Rotate them so they are horizontal, about the height of the barrel off the ground, and weld a gravestone to the back. Weld it near the middle so equal amounts of stone stick out above and below the poles.
Sorry about the crappyness of the picture, but I think you know what I mean. Attach wheels to the sides of the tombstone, don't set any control keys. These wheels rotate freely. By the way, I'm using tractor or APC wheels because they're big and easy to work with. These are one thing I suggest not experimenting with. Using carousels on this bad boy wouldn't work so well. Once the wheels are on there, position the cannon over the base and weld the two side wheels to the base wheel. Move the unit by the gravestone, and leave it frozen in place when you're done. Those poles are trick to balance.
Put hoverballs on the end of each pole, with a movement speed of 4 and an air resistance of 2. Set their 'up' and 'down' keys to '8' and '2'.
Make a stick of dynamite or two with a power of 6000. Make the 'detonate' key '5'. You can, in fact, use other dynamite settings. I used 4000 at first, but it was barely competition for flinging things with the gravity gun. Easy weld the dynamite to the BACK of the gravestone. This allows you to fire explosive barrels without detonating them when you fire the cannon. Being hit by a barrel is nothing. Being hit by a barrel that's on fire and blowing up and getting that whistling sound in your ears is way better. You may have to adjust dynamite power, and maybe add some packing, such as a regular barrel welded to the tombstone resting on the poles to separate your explosive payload from the dynamite.
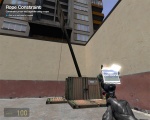
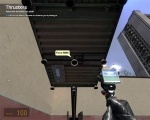
Make some kick-butt controls so everyone can fire your new toy. Use the inspirational posters from cs_office as screens for the RT camera, and use buttons to move the cannon. You can learn how to do this in other parts of the wiki, so I won't bother to explain them. Don't forget to weld the RT camera to the gravestone so it turns with the cannon.
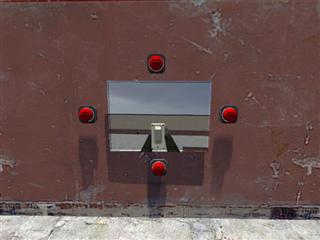
In this picture, the white thing in the middle is the launch button.
Now for post scripts. You actually can change the numbers or the design of this cannon, even both, and it will work! Amazing eh? You can launch different projectiles simply by altering the quantity and position of the dock poles. (A dune buggy set to 'keep upright'?...With you inside? Heck yes.)
EDIT: For a magazine, simply spawn the ammunition of your choice (probably an explosive barrel) and rotate and drop it into the cannon as if you are going to fire it. Then select "prop spawner" tool, set the settings to zero, and fire it at the barrel to turn it into a barrel spawner. Raise your spawner a bit and then weld it to the cannon so it rotates with it. Now, if you need more ammo, press the button you assigned to the prop spawner and fire! (Idea by Twisted)
Mobile Catapult
| War Devices: Mobile Catapult |
| A slightly advanced catapult, but can be moved around easily. | |
| Shook | |
| | 19 December 2006 |
| | - |
Well if you need a reliable and powerful catapult, then this is a good choice.
Construction
- Spawn a large dock pole, long one for long throws, and vice versa.
- Use the Wheel tool to spawn a couple of APC wheels with minimum torque on the pole, so the edge of the wheels are somewhat parallel to the flat end of the pole, like shown on image.
- Weld the wheels together. They should act like a pivot point for the pole.
- Spawn 2 Blast Door 3's (Big ones)
- Put them together like shown on the image.
- Use Phys Gun on one of the wheels and put it about in center of the vertical blast door (Next image)
- Solidly weld the wheels on to both blast doors
- Repeat step 4-5 and weld it on to the second APC wheel, like on the image.
- Weld all blast doors and wheels together.
- Spawn a rather big and flat object (blast door 3 is good)
- Easy Weld it onto the end of the pole, like shown on image.
- Spawn a blast door 2 (smaller one without a sticker) and attach it like on the image. Weld it onto the other blast doors and wheels.
- Tilt the arm to a good throwing angle (about 80o will do) and freeze it.
- Attach a rope from about the middle of the small blast door to somewhere near the end of the pole, like on image.
- Almost done now! Attach three thrusters with 10000 for power with on to the end of the pole, like on image.
- Already here it will work just fine, but for a little more versatility, do this:
- Attach nine 10000 power thrusters on to the plate on the pole, like on image. This will give the possibility for a much more powerful throw, allowing you to fling heavy stuff far away. Remember to make them with different buttons than the other three.
Images
 |  |  |  |
 |  |  |  |
 |  |
You're done! Now go have fun with it. Oh, and umm, you only need to freeze the small blast door to make it able to throw.
RC Weapon Platform
| War Devices: RC Weapon Platform |
| A simple way to make a true war machine :D | |
| Umbrella of the UC | |
| | 25/12/06 |
| | - |
This simple design is excellent for all your Weapons Platform needs, this Turret example is pure evil anywhere, especially on any onslaught map. Lots of fun :D
Construction
Create a carousel wheel with about 250 torque and 275 friction, 6 for forward, 4 for back.
Spawn something like a dock pole or I beam, and then easy weld it to the carousel.
Create another carousel wheel on the I beam/pole again but using 8 for forward and 5 for back.
Spawn something such as a barrel and create your desired turrets on it, I find it best to have an accurate array accompanied by one with some spray, this makes it easier at different ranges. Weld a camera behind the turrets
Easy weld what the camera and turrets are mounted to onto the top carousel.
And your done! You now have built yourself a Gmod Incarnation of the devil >:D You may want to change the direction of the wheels to make 4,6,5 and 8 correspond to left, right, down and up
Modification Ideas
- Your prop with the weapons attached may be too heave and cause the platform to big off angle, to correct this simply go to the Physical Properties tool and toggle gravity to off, then apply this to correct the wonk.
- You may wish to change are what you use, I find that the carousel is the only thing that works with friction on which is there to stop the RC Turret from spinning too much after you’ve rotated making it easier to control.
- Making the friction/torque lower/higher for a more/less rapid movement but I found 250 and 275 suffice.
- You could also make a control system for it like demonstrated on the Remote Base Defender Cannon but probably not worth it.
- You could keep the cannon static or make it mobile on the top or bottom of a flying platform.
- Add more firepower! You could use the basic system as a platform for just about any weapon, but some things will require a bit of work to be effective, such as cannons, since they tend to send the WP spinning from the recoil.
- Cross hairs can be handy, you could make one with ropes and objects welded in front of the turrets are a simple idea.
Hope you enjoy making, playing about with and using this as much as I do!
Here’s some pictures of it in action from the camera's point of view, the turrets’ mount is a bit off angle because I welded it improperly, but still smites :D
 |  |
 |  |
The Easy Catapult
| War Devices: The Easy Catapult |
| A powerful catapult that can be made in a few simple steps. | |
| Dan 44-44 | |
| | Unspecified |
| | - |
What you need
2 dock poles a pod some elastic
Construction
- Take 2 dock poles an put them upright and parallel in the from the floor up
- Spawn a pod. Put them about 20 feet away from the poles
- Put some very strong elastic (have a play with it) and rope the bath to both the poles
- To fire pull back the pod and hop in press r and you and the poles will fly away!
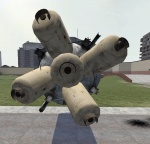
Spin Stabilized Rocket
| War Devices: Spin Stabilized Rocket |
| A rocket stabilization method | |
| TAD2020 | |
| | December 26th 2006 |
| | - |

Construction
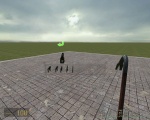
- Spawn the large upright colling tank and freeze it off the ground.
- Slap any flavor of thruster as dead center on the bottom of the tank as you can. I set power really-really high; this thing is heavy and it may not fly as well if made lighter.
- The hard part is sticking the next four thrusters on. They need to be placed evenly around the first thruster, in the right spots. I've marked on a screenshot where to place them. Put one on either side of this line (not both) near a circled area. You will be able to "feel" this line with the thruster tool, the ghost will flip and flop over it.
- Repeat this for each side of the tank, placing one on the same clock-hand-side of this line.
The base of the large cooling take will cause the thrusters to point just off to the side instead of straight out. This will make the rocket to spin in flight causing it to have a much straighter trajectory with only a little wobble (less if the thrusters are placed well).
You could instead place low power thrusters on the side corners of your rocket to achieve the same effect, but it wont give you additional forward thrust or be as "pretty".
 |  |  |
Customization
WIP: Needs a warhead to improve it's killing power.
Edit by Lunatic: Weld a dock plank onto the front. Then well numerous pieces of dynamite to the plank. Make a delay ad of half a second or less. When the first dynamite goes off, the plank will be destroyed and drop the dynamite. To spread the dynamite, weld one small but unbreakable object to each piece of dynamite. The dynamite will spread from the blast. Edit by Eilios: A better idea is to spawn an explosive oil barrel, grab it with the gravity gun, and throw it as high as possible. The next thing you do is immediately grab it with the Physics gun, and freeze it as close to the tank as possible WITHOUT TOUCHING IT. (this part is essencial as it will explode if you do not). Then simply weld it to the missile, and when it collides with somebody or something, it will simply explode, killing that person instantly. If you can, noclip it with the ground and any possible defenses they may have.
Über Turret Mach 1
| War Devices: Über Turret Mach 1 |
| An RC Turret which can shoot in any direction. | |
| Z3rb | |
| | December 30th 2006 |
| | - |
Construction
This is an easy turret to make, and the rewards are nice.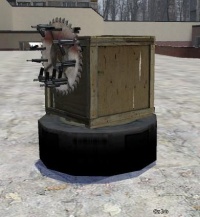
- On the ground, Create a large wheel (I usually use the Truck wheel or the APC wheel) and bind the "1" key to forward, and "2" to reverse.
- Spawn a crate, preferably the unbroken one.
- Weld the crate onto the wheel, so that the wheel can still spin freely and the crate goes along with it.
- You now have an option, if you want added coolness, you can add another wheel onto the crate, in this case the saw blade, if you wish, you can bind different keys to this one.
- Now, spawn as many Turrets as you want on the newly added wheel or just add them to the crate if you didn't add the wheel, bind these to "3".
It may not look impressive, but the damage it can cause is quite nice.
Über Turret Mach 2
| War Devices: Über Turret Mach 2 |
| Another RC Turret which can shoot in any direction. | |
| Z3rb | |
| | December 30th 2006 |
| | - |
Construction
This one is as easy to make as the Mach 1, but produces a lot more damage.

- On the ground, create a wheel made out of the carousel. Bind the "1" key to forward, and "2" to reverse.
- On each of the handlebars of the carousel, spawn another wheel but make them out of the APC wheels. Use the same key bindings as the carousel, unless you don't want to.
- Spawn as many turrets as you want on the APC wheels and use "3" to shoot.
I tested this with about 100 fast zombies, and it took them all down withing 20 seconds.
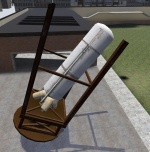
Slingshot
| War Devices: Slingshot |
| Silent elastic powered slingshot. | |
| Gh0st3000 | |
| | December 30, 2006 |
| | - |
Construction
- Spawn 2 deck poles and Weld them to the ground.
- Spawn a bathtub and position it between the 2 poles at a 45 degree angle with the physics gun. Freeze it. (if you have the PHX model pack, the 360 degree domes work well instead of the bathtub)
- Using the Elastic tool, attach Elastic between the top of the poles and sides of the bathtub. (maximum elastic power is recommended)
- Using the Slider tool, aim at the back of the bathtub and make a perpendicular slider to it.
- Using the physics gun, slide the bathtub backwards, and place dynamite, explosive barrels, or yourself in the bathtub and let it fly. Your enemy won't know what hit them ;D
Modifications
- For easy setup/reloading, once you've attached the Slider constraint, add a Winch (settings: high increase speed, low decrease speed) in the exact same places you attached the Slider.
- You can, if you like, add buttons to your Slingshot so your friends can fire and reset it as well. Be sure to set the buttons to the increase length and decrease length keys of your Winch.
Images
 |  |  |  |  |  |
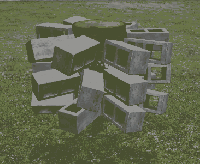
Pineapple Grenade
| War Devices: Pineapple Grenade |
| Anti-personnel (and wood) grenade. | |
| Gh0st3000 | |
| | December 31, 2006 |
| | - |
Construction
- Spawn an explosive barrel (or anything else which explodes)
- spawn many cinder blocks, and using the Easy Weld tool, weld them all along the side of the barrel.
- More cinder blocks equals a bigger spread, but less cinder blocks means a lighter projectile, and most importantly, less cinder blocks reduces the chances of a spaz-out explosion, which the grenade can be prone to.
Exploding Spawner Grenade
| War Devices: Exploding Spawner Grenade |
| spawning explosive barrels in a concealed container makes *boom*! | |
| Aceypoo92 | |
| | January 1, 2007 |
| | - |
Construction
- Spawn some sort of tube or box that can be sealed that is bigger than a barrel
- Spawn the things that will seal the tube or box
- Spawn an explosive barrel (or anything else which explodes)
- Easy weld one sealer to the tube or box
- Easy weld the barrel inside the tube or box to the sealer
- Make the barrel a Prop Spawner
- Seal the other side of the box or tube
- Toss it and start prop spawning
- Soon the barrels will destroy each other inside the tube or box and explode
- (may lock up your game!)
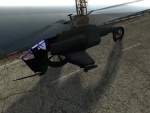
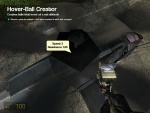
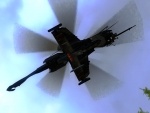
Heli Bomber
| War Devices: Heli Bomber |
| A helicopter that can be used for dropping heavy or explosive props. | |
| okw1003 | |
| | January 2, 2007 |
| | - |
Construction
- Spawn a Combine Chopper.
- Attach a hover-ball at the median point of the helicopter. The point which helicopter's wings exists is the median point. Any setting will work, but I gave 2.5 speed, 1 resistance, 10 strength. If you do not place your hover-ball at the median point and the hover-ball has the air resistance value, it won't be able to sustain itself.
- Spawn a dynamite and (Easy-)weld it at the bottom side of the helicopter. It seems that damage doesn't affect the velocity, so decide damage as you wish, and give some delay. If you are planning to mount explosives, the dynamite should HAVE delay or they may not explode.
- Spawn a prop that you want to drop from the chopper.
- Make it as a prop spawner, and make sure that the key of the spawner equals the key of the dynamite, or your fingers will hurt.
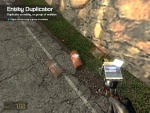
- Duplicate as you want.
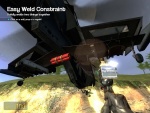
- (Easy-)weld the spawners at the both wings of the chopper.
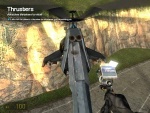
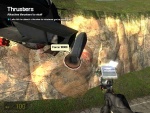
- Mount Thrusters at the chopper as you can actually move the chopper. At the backward for forward thrust, right wing for left turn, left wing for right turn.
- MAYHEM!!
Images
 |  |  |  |
 |  |  |  |
 |
Attention
- As mentioned, place hover-ball at the median point or it won't sustain itself.(Any other ideas are welcome.)
- If you are going to drop explosives, you should give a delay to the dynamite.
- If your "weapon" doesn't break, then make the spawner self-undo its props. If not, you'll be kicked or banned at worse, for making a lot of craps!
Customization Idea
- You may attach a pod to make sure that you can ride.
- You may attach a turret at the gun barrel or anywhere else to make the secondary attack!
- You may let your RC Droids(This is not the exact name of a contraption; I used this term just to categorize) and place them using your helicopter.
- If you put on turrets, remember, more guns equals deadlier!
- Try putting missiles on the wings. Just weld them on with a weld that will break when the thruster is turned on. If the missile is large, turn off its gravity.
- For dynamite that explodes when you want it to, weld dynamite without a delay to the barrel (make sure it has a different key), then you can fly the helicopter to your drop-zone, drop your stuff, and then blow it up!
Basic air-bomb
| War Devices: Basic air-bomb |
| A very basic air-bomb | |
| TommyGun | |
| | 7/1/07 |
| | - |
This is easy to make, and self-detonating.
Construction
- Spawn a vending machine and a barrel of explosive
- Raise the vending machine so it is about a barrel-length above the barrel, and freeze it place.
- Rope together the vending machine and the barrel.
- For a larger area of effect, weld more barrels onto the existing barrel.
Now you have a bomb that can be dropped from a height on someone. Just be careful you don't set it off.
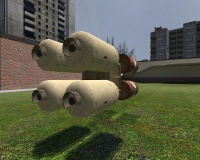
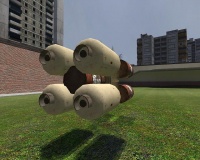
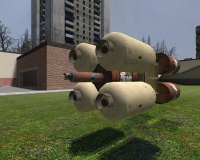
TOW - Missile
| War Devices: TOW - Missile |
| Making a easy to build missile made of wood. | |
| Crimson | |
| | January 16, 2007 |
| | - |
Construction
- Spawn a "woodenboard07".
- Spawn a propane tank.
- No collide the propane tank to the wooden board.
- put the propane tank so it is inside the center of the wooden board in the same direction.
- weld the propane tank to the wooden board.
- attach 5 thrusters at 10000 power each to one end of the wooden board.
You now have a very accurate missile that with explode on contact!
Anti-Aircraft Turret
| War Devices: Anti-Aircraft Turret |
| A rotary machine gun turret with a high-pitched angle of fire. | |
| Mandible | |
| | January 19, 2007 |
| | - |
Construction
- make an APC wheel on the ground with whatever speed settings you want. Make it easy to stop.
- spawn a refrigerator door. Easy weld one of the short edges to the top rim of the tire it will attach at an angle facing upwards.
- attach 4 turrets to the door. Set them with a low spread and whatever noise/damage you want.
- attach a hoverball to the top of the door.
- you can now spin the turret and adjust its angle with the hoverball. Enjoy!
- note*pictures to come. please bare with me*note*
Buoy Missile
| War Devices: Buoy Missile |
| A very accurate missile that can be improved upon. | |
| Lunatic | |
| | January 20, 2007 |
| | - |
Construction
- Spawn a buoy from wasteland section of prop list, I believe, or search for it. It may be spelled bouy.
- Lay the buoy on the ground sideways.
- Put 4 thrusters at max power on the end of the framework. Put two on the little stubs sticking out, two more in respective positions.
- Put one max thruster each on the lip of the buoy, right next to the side of the framework.
- You're done. This is very accurate. Try experimenting with this design.
- One way to launch this is to make a weak weld that will break when the thrusters are activated.
- This all sounds complicated, but it isn't...if there are pictures, which I don't know how to insert.
Weapons Packs
| War Devices: Weapons Packs |
| Some additions to liven up games | |
| TommyGun | |
| | February 11, 2007 |
| | - |
Malawar's STool Pack
- Launcher - Fires either a dumb missile or thruster-seeker
- Harpoon Launcher - Fires a harpoon that can reel in objects/reel you in
- Cannon - A variety of different cannons (e.g. Railgun, Flak Cannon)
Other Packs
- Prop Cannon - A cannon that fires props of your choice (e.g. melons). By "Dunk".
MingeBot MK. III
| War Devices: MingeBot MK. III |
| A deadly machine that goes through walls and has responsive controls. In version 3, there's magnetic pickup, barrels of doom, and more! | |
| BTchaos (Facepunch Forums | |
| | 25/02/07 |
| | - |
Intro
The MingeBot was recently introduced to the Facepunch forums. It was an amazing killing machine. Now in it's third edition, it's more effective than ever. The forum topic is here, however it uses videos instead of instructions: http://forums.facepunchstudios.com/showthread.php?t=286657
Parts
Basic MingeBot
- Lockers (the four lockers)
- 1 Camera
- 1 Saw Blade wheel
- 4 Hover Balls
- 1 Thruster
No-clip
- 1 Advanced ballsocket per prop
Spinning Wheel of Doom
- 1 Propeller blade wheel
Barrel launcher
- 1 turret
- 1 explosive barrel
- Prop Spawner tool
Anti-Flip
- Keep Upright Tool
- 1 Thruster
360 Turret
- 1 Camera
- 1 Sawblade Wheel
- 1 Turret
Construction
Basic MingeBot
- Create lockers, lay flat on ground and suspend 2 feet in the air
- Add hoverballs to top 4 corners. Settings of 4.5 Speed, 7.5 air resistance, 10 strength.
- Add thruster at top back with settings: paint can, 300,000 force.
- Add sawblade wheel to top with settings: 1,250,000 torque, 0 friction. Weld it to the lockers.
- Look straight ahead, parallel to ground. Create camera.
- No-collide camera with lockers and wheel.
- Move it so mostly the lens is the only thing sticking out.
- Weld it to both the lockers and wheel.
No-clip
- Goto advance ballsocket, set the settings to 'Free Movement' and 'No-collide'.
- Use the advance ballsocket between every part and the nearest wall.
- You may want to do the no-clip after everything else, as you'll have to do the other parts too
Spinning Wheel of Doom
- Merely use a propeller blade wheel on the top front corner of the lockers. Make sure the 'Toggle' box is selected
- No-collide it with nearby props.
- You disable gravity via physical properties if you wish
Barrel Launcher
- Freeze the lockers
- Spawn an explosive barrel nearby
- Use the prop spawner tool on it
- No-collide it to the body, camera, and wheel
- Lay it on its side and position it on the slanted edge of the lockers. Weld it.
- Add a turret with these settings: 1 bullet, 10 damage, 100,000 force, 0.1 rate of fire, toggle off.
- Set it to the same key as the prop spawner.
- Position it on top off the wheel, so that it's pointing at the prop spawner.
- Weld it to the prop spawner.
Anti Flip
- Use a half-strength keep-upright on the lockers
- Place a thruster on the underside of the body with the same strength as the one used for propulsion. This can be tapped to flip the MingeBot
360 Turret
- Attach a sawblade wheel to the front of the body on the side. Set it to 8000 torque, 25 friction, and no toggle.
- Attach a turret to the edge of the blade.
- Freeze the wheel and spawn a camera. Fire the turret to see where it hits, then easy weld the camera so it's pointing to that spot.
- No-collide it all to the main body
- Use physical properties to disable gravity on the turret/camera
Whoa, that's it!
That's it! Depending on what you chose to add, you'll now have an incredibly effective killing machine.
ACPs RT Turret
| War Devices: ACPs RT Turret |
| A completely remote controllable turret | |
| ACProdigy | |
| | March 26, 2007 |
| | - |
A remote-controlled turret. ACPs Turret has its own page due to length. To see it and building instructions, please click link provided.
Dud Grenade
| War Devices: Dud Grenade |
| What's more powerful than a barrel, explodes in 5 seconds, and is in limited supply? A grenade. What's stronger than a barrel, doesn't explode unless you catch it on fire or pick it with the gravity gun, and is in limitless supply? The Dud Grenade! | |
| Fastcat09 | |
| | Januaruy 26, 2008 |
| | - |
Construction
First, find a spot on the map your using to drop your grenade. I recommend a corner of some sort to make sure the grenade doesn't bounce away from you. Once you've found your spot, right-click to drop your grenade. Quickly switch to the prop duplicator and right-click the grenade. Then get away from it as fast as you can. If you managed to duplicate it in time, you now have a grenade that, when spawned, will just sit there till you detonate it. To detonated a grenade, ignite it, hit it with an explosive (regular grenade, RPG, exploding barrel), or pick it up with the gravity gun.
Images
 |  |
Note
Igniting the Dud grenade will cause it to explode immediately.
Picking the Dud grenade up with the gravity gun will cause the gernade to start ticking and explode in 3 seconds, not the regular 5.
Slamming the Dud grenade against the ground will NOT detonate it.
Portable Turret
| War Devices: Portable Turret |
| A compact turret that can be easily moved from Point A to Point B. | |
| Crazyking | |
| | March 31, 2008 |
| | - |
Requirements
- PHX Models
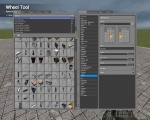
- Wheel Tool
- Turret Tool
- Color Tool
Construction
1. Spawn the PHX metal tube (The open box)
2. Take out the wheel tool and attach a saw blade wheel. Set the forward key to . with no reverse. The torque should be around 6000
3. Freeze the wheel
4. Stick four turrets on with the key set to .
5. Take out the color tool and set the Alpha slider to 75. This helps aiming.
Using the Turret
It's simple. Press . to fire. If you want to move it around just use the Physgun to grab 'n go. Freeze it while firing or hold it with the Physgun.
Non-PHX Users
Don't have PHX Models? Don't worry! Substitute other indistrucable props such as Soda Machines for the metal tube. Also, using soda machines has a nice advantage: you can put on 2 wheels!
Alternate Cannon
| War Devices: Alternate Cannon |
| A different way to make a nice cannon. | |
| Crazyking | |
| | March 31, 2008 |
| | - |
Requirements
- PHX Models
- Turret Tool
- Prop Spawner Tool
- Weld Tool
- One PHX Cannon Ball
- One PHX Cannon
Construction
1. Spawn your PHX Cannon and freeze it
2. Spawn your PHX Cannon Ball and make it a prop spawner. Set the spawn key to + and no undo key. Make sure the delay is 0.
3. Place a turret inside the cannon. Settings can be anything, but make sure you have max bullet force and the key set to +. Now weld it to the cannon.
4. Using the Physgun, stick the cannon ball spawner inside the cannon and weld it. Make sure that the turret will hit the cannon ball when it spawns.
5. Press + to fire a flaming cannon ball at a target. If you want to get rid of all the cannon balls that you will spawn, use the Gravity Gun and slam them against a wall/floor/etc. Another method is to use the Breakable Props stool from the Conna's Tools addon, setting the health to 1 and using a gun to break it.
Rotating Turret
| War Devices: Rotating Turret |
| Extremely effective rotating turret. | |
| Crazyking | |
| | March 31, 2008 |
| | - |
Requirements
Basic Turret:
- 1x PHX 360 Window Tube
- 2x PHX 360 Window Plate
- x4 Turret Tool
- x1 Motor Tool
- x3 Weld Tool
Ridable Turret:
- 1x PHX Metal Box (The bigger one)
- 1x Pod Vehicle
- 1x Easy Weld Tool
- 1x Weld Tool
Construction
1. Weld together the Window Tube/Plate Props
2. Motor the tube you make to the ground somewhere. Set the forward key to 8, no reverse. Set the torque to something in the mid 1000's
3. Using the Turret tool, put four turrets on the tube (Evenly spaced). Set the key to 8
4. Press and hold 8 to activate it!
Ridable (This part is 100% optional, but reccomended) 1. Spawn the PHX Metal box and freeze it with the Physgun
2. Spawn the pod vehicle, put it roughly in the middle of the tube, and weld
3. Put the pidable box up into the air and Easy Weld it ot the top of the Rotating Turret Tube
4. Unfrese everything, noclip/jump onto the turret, get in the pod, and you're done!
Escape Pod
| War Devices: Escape Pod |
| A Pod that will rocket skywards when you activate the timer. Note = you need rabid toasters superfreeze for this to work effectivaly | |
| TechDante | |
| | Feb 19th 2008 |
| | - |
construction is easy and you only have to get one extra stool for this to work more effectivally, that being Rabids Toasters superfreeze.
what you will need
Props
 |
1. Pod
2. Small Wooden Box
3. Trash Can
Stools
1. Superfreeze (link if you don't have it) [1]
2. Weld
3.Dynomite
4. Button
5. Sound Emitter (if you want to warn people that you are about to go otherwise skip that section of the tutorial)
5. Elastic (the most inportant part without this it would not work)
'Construction
1. spawn the pod and drag it to the top of the roof of the map ( straight up of to one of the corners) Freeze it there
2. get the elastic and attach it to the top of the pod and to the roof of the map (unfreeze that pod and it should bounce around there)
3.Grab the pod and drag it back to the spot where you want to leave from and freeze it to the spot . leave it and we'll go back to it in a bit
4. take the trashcan and place it in the exact sopt where you want to leave from and the "Superfreeze" it to the floor then place the dynomite in the trash can and "Superfreeze" it in there.( set the dynomite to 0 with a delay of about "5 seconds" else you will not be able to get into the pod before it goes)
5. take the box and place it onto teh tashcan it should sit there and not move, '"Superfreeze"' it there.
6. Move the pod close to the box and then weld it on (making sure that there are strong welds or it will take off)
7. unfreeze the pod and it should stay on the box otherwise it will take off and you will have to fetch it.
8. take the button and stick it onto the pod (assign it to 0)
9.(skip this if you donot want sound) take the sound emmitter and set the button to 0 and tick the toggle so it is on.
10. weld the emmitter to the trash can
finished
 |  |
Function
if you have done this correctly then once you press the button you have 5 seconds to get into the pod then the dynomite will break the box allowing the pod to be pulled in by the elastic to teh desinated safe spot.
 |
'Expantion to the design
>having 4 pods welded together so that they will fit around the box allows for a mass escape. one person will have to push the button but they have time to get into their pod.
>putting a camera facing down above the pod gives a nice effect showing where you just escaped from
>colour in the pod for fun
>this could be utalised in fort wars if the objective is to kill the other team (make a base at the other safe zone and regroup there
>Use of a numberpad and turret so that the sound emmiter will sound for a four seconds and if incorrect will shot the intuder.
>Noclip a dumpster over the wooden box so it willnot break if someone shoots it.
Admin Gun
| War Devices: Admin Gun |
| Creates an explosion wherever you click | |
| mccrapper | |
| | Jan 30 2009 |
| | It even works in servers with no pvp damage |
Props
1. explosive barrel x2
'Construction
1. Spawn 2 explosive barrels quite close. DO NOT FREEZE THEM!
2. Connect them with ONE rope with a length of negative 1000
3. Duplicate it with the normal duplicator, not adv. duplicator
4. It's finished! Wherever you click (with the dupe tool,) it will make an explosion.
Reliable Cluster Missile
| War Devices: Reliable Cluster Missile |
| A very reliable, powerful and easy to use rocket that doesn't leave junk behind other than barrel debris. Doesn't require any addon. | |
| _Kilburn | |
| | March 1st, 2009 |
| | - |
 |
Requirements
 |
|
SmartSnap is the only recommended addon, although you don't really need it, it only makes things faster.
Construction
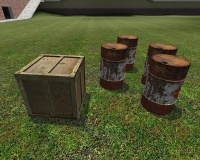
 | 1. Freeze the wooden crate in mid-air, then weld 4 explosive barrels to each corner. This will be the warhead, the part that will actually inflict damage. |
 | 2. Create 4 thrusters on the crate, opposed to each explosive barrel. Use the fat propane canister as the model, and tick "Activate on damaged". A force of 1000 will do nicely. Also, no numpad key will be used for triggering those thrusters, therefore click on the currently set key to deselect it. |
 | 3. Weld the last explosive barrel to the center of the crate, between the 4 thrusters. This is the explosive part that will ignite and scatter the 4 other barrels. |
 | 4. Finally, freeze that explosive barrel (to make sure everything will be aligned), and weld the propane canister to it. This will be the fuse, all you'll need to do is ignite it to launch the rocket. For stability reasons, weld every object to the fuse. You'll have to do this so when you move your rocket around, it doesn't wiggle and spazz out. |
 | 5. Unfreeze everything, grab the fuse, rotate it in the desired angle, freeze it, and duplicate it. Here you go, now all you need is to paste copies of your rocket, and shoot the fuse to launch them. |
The good thing about this rocket is that it doesn't take any numpad slot. So you can basically spawn a bunch of those and bomb the enemy repeatedly without having to launch them all at once. Very effective when playing fort wars, since it is pretty easy to set up, and looks more badass than a simple rocket made out of barrels. Its weight and structure also makes it more accurate than most simple lightweight rockets.
Trebuchet (floting arm)
| War Devices: Trebuchet (floting arm) |
| A very reliable, powerful and easy to use Trebuchet. Doesn't require any addon. | |
| TheSliPKnotsEmperorEuan | |
| | NO idea |
| | - |
Requirements
- 2x longest dock poles
- 10x longest ladders
- 1x small box, crate
- whatever you want to fire
- the weld tool
- the axis tool
- adv dup if you want to copy
Construction
- useing 4 of the long ladders make two sides of the base welding them lengthways
- then join them togheter at the ends using 2 of the dock poles (you should now a have a large rectangle)
- now using 4 of the ladders make 2 triangles on both the long sides of the rectangle this sould make a large frame to hold the arm
- now weld the last 2 laders lengthways to make one long pole
- now put the ladder in place at the top of the triangles with one end VERY long and the other short
- then using the axis tool RIGHT click the pole on one of the triangles mmake sure that it is in line with the ladder at the top then RIGHT click the side of the ladder closest to you.
- !!!the arm sould now swing freely if it doesn't refer back to the last page!!!
- finally using the axis tool again with right click attach the crate or box under the end of the short side of the ladder and change the weight to 10000 then change the weight of the ladders to 300.
- then select your ammo set the weight to 100 and attach it to the long end oft he arm using the rope tool set the force limit to between 500-10000 depending oin the weight of the thing you are fireing
ENJOY
QSD Grenade
| War Devices: QSD Grenade |
| A very quick-to-make grenade-type item reminescent of Megaman 9's Black Hole Bomb, with results that last even a short time after the explosion! | |
| Kingsonnn DeDeDoo | |
| | August 22, 2009 |
| | - |
Requirements
- Sakarias's Quantum Storage Device
- Explosive Barrel/Magnusson Device
- (optional) Advanced Duplicator STool
Construction
- Spawn an explosive barrel (or Magnusson Device), and a Quantum Storage Device.
- Weld the Quantum Storage Device to the barrel/striderbuster.
- (optional) Adv. dupe the QSD Grenade so you can spend even LESS time on making it after using the first one.
- Grab and punt with the gravity gun to detonate.
If you did it right (you must have screwed up REALLY bad to have done it wrong though), then A. there is no evidence of an explosive barrel/Magnusson Device attack, B. it will be dangerous to enter the area for a few seconds after the detonation, and C. it will also destroy props and contraptions within the vicinity!
Enjoy!
Magnetic Missile
| War Devices: Magnetic Missile |
| A magnetic missile that is capable of ruining welds of unfrozen metal objects | |
| Aperture Lab Rat | |
| | September 17, 2009 |
| | - |
Requirements
- Garry's Mod
Construction
- Spawn a canister01a (the long grey capsule)
- Magnetise tool (100000 strength, max objects 99, always on, all other settings off) on the canister.
- Physical Properties tool (uncheck Gravity Toggle, select Metal) on the canister.
- Aim the missile, the with physgun, at the targeted contraption (car, ship, etc.)
- Mwheelup+letgo. The torpedo will both send the target flying off into the distance and grab hold of the metal objects it comes into contact with.
Altercations
- Attach a thruster (wired or not, doesn't matter) with any settings you want, as long as thrust is over nine thousand (actually, not just joke :P)
- Use differently-sized props (larger = more damage, smaller = harder to get rid of).
- Apply No-Collide All to the torpedo
- Include a hover-ball or two that have high movement speeds and no air resistance. Be sure to use them.
- Have a winch or other constraint to somewhere else, so as to be capable of towing the contraption in.
- Make the torpedo invisible
- Use wire to attach a colorer to the end of the torpedo, with varied settings (0 alpha maybe? :K).
Secret Office Turret (360 Rotation)
| War Devices: Secret Office Turret (360 Rotation) |
| A hidden Office Turret Controlled by you. (Can Rotate 360 Degrees) | |
| Artonkn | |
| | April 12, 2010 |
| | - |
Requirements
Gmod 10! (Possibly Do able in 9)
Instructions
1. Selct the Wheel tool.
     -Preferences: Keys 1 forward and 2 Bacckwards
                 - File Cabinet Model
                 - And around 800 torque
2. Place In you office area (or your test area)
3. Check the rotation Works and does not clash againts any walls or other objects
4. Select the turret tool with any preferences (Suggest Highest for quick kill)
5. Place on the top grey metal Tag area
6. Check the rotation again making sure the turret does not clash againts anything
7. Check the turret is not in range of any of your normal office area items (or where you sit :D)
8. Select the colour tool and set the transparency to 0 (colour does not matter)
9. Use it on the turret (not the cabinet)
10. It is suggested that you use the paint tool to make a maker of where it is to avoid shooting yourself and to increase accuracy.
11. For extra stealth and cunningness add some normal cabinets nearby so they won't suspect anything.
12. Make Sure you add a marker on your turret cabinet so you now which one it is
13. Have Fun :D
360 User Turret
| War Devices: 360 User Turret |
| A 360 Turret used by a player and has a sight(optional). | |
| GmanTheStalker | |
| | July 9, 2010 |
| | - |
Requirements
Objects
- 1 Flat Object
- 1 Long Object (like a pole)
- 1 Vehicle-Based Seat
Tools
- Wheel Tool
- Turret Tool
- Easy Weld/Weld Tool
- Light Tool (optional)
- Camera Tool (optional)
- Advanced Duplicator Tool (optional)
Construction
1. Spawn a Flat Object - preferably a PHX Metal Plate. This will be your base.
2. Use the Wheel Tool to spawn a sawblade wheel on the middle of the base with 4 and 6 for forward and backwards. UNCHECK TOGGLE! Use your own settings, but try not to make the wheel spin faster than you can aim.
3. Spawn a Long Object (I used a PHX 1x1x4 object). Weld it to the middle of the sawblade wheel.
4. Use the Wheel Tool to spawn a car wheel on the long object with 8 and 5 as up and down (feel free to invert this). UNCHECK TOGGLE! Use your own settings, but try not to make the wheel spin faster than you can aim. Freeze the wheel using your Physics gun.
5. Use the Turret Tool to spawn and weld a turret to the side of the car wheel with 0 as fire. Try to aim at the middle of the wheel curve. Use any settings you want for the turret. You can also spawn multiple turrets.
6. Spawn a vehicle-based seat like a hoverboat seat. Straighten it out and weld it precisely on the wheel. DO NOT use easy weld, since the seat will only touch the long object. This will let the seat turn with the wheel while the seat will look like it is part of the inside of your turret.
And you're basically finished! Hopefully you followed all of my instructions and the turret will aim correctly.
NOTE: If you fire at the bottom wheel it will cause you to spin!
Some things to add:
- Sights: Use the Light tool to spawn a light bulb. USE THE RIGHT MOUSE BUTTON. If you use the left mouse button, it will spawn on the ground with a rope attached to it. Try to position the light bulb where your fire lands. Weld (do not easy weld)it to your seat and turret gun(s).
- Camera: If you want to not use a seat, use the camera tool to create a camera. Easy weld it to the seat in a way that you would still see where the turrets are firing at.
- Duplicating: If you want to spawn this turret on servers, select the Advanced Duplicator Tool and right click on your turret. In your Q-menu press Save. Enter a name and some descriptions and press OK. Now you can spawn these in other servers!
Laseraimed Dronelauncher
| War Devices: Laseraimed Dronelauncher |
| A dronelauncher that fires everywhere you point at with your laserpointer | |
| DocChaos | |
| | August 10, 2010 |
| | - |
Requirements
Addons
- Stargate Mod
- Wire Mod
Tools
- Drone Launcher
- Laserpointer Reciever
- Constant Value (Values: 1: 1)
- Wire Tool
Weapons
- Laser Pointer
Construction
1. Spawn a flat metal plate or something else where you want your contraption on. 2. Spawn a Drone Launcher on the object 3. Spawn a Laser Pointer Reciever on the object 4. Spawn a Constant Value on the object
Wire
- Launch(Drone Launcher) -> Active(Laser Pointer Reciever)
- Lock(Drone Launcher) -> 1(Constant Value)
- X(Drone Launcher) -> X(Laser Pointer Reciever)
- Y(Drone Launcher) -> Y(Laser Pointer Reciever)
- Z(Drone Launcher) -> Z(Laser Pointer Reciever)
What you can modify:
- Add a button, so you can attack a preset target from a safe point.
- Add a second launcher and wire it the same way for more firepower.
