Air Vehicles
From GMod Wiki
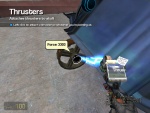
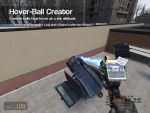
Air vehicles are usually some kind of transport which travels via the air (touching the ground only when landing or crashing). Popular tools for making air vehicles include: hoverballs, thrusters, balloons, (easy) weld, and keep upright.
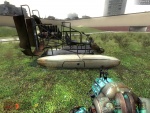
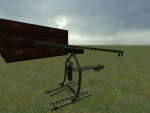
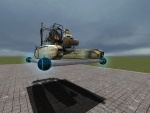
V-22 Osprey
| Air Vehicles: V-22 Osprey |
| Mixture of a heli and plane with tilting wings an propellers. Hard Difficulty. | |
| Mr. Hankey the Christmas Pooh | |
| | 22. June 2010 |
| | - |
Requirements
- PHX 1,2,&3
- Wiremod
- Preferably Smart Snap
- Half a brain
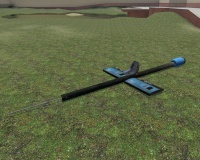
Construction
- Spawn a 1x2x2b phx frame
- Spawn a tri-1x1x2 phx frame
- Spawn two tri-2x1x1 phx frames
- Spawn a tri-2x1x2 phx frame
- Choose a side of the 1x2x2b to be the front and easy weld the tri-1x1x2 on it so the triangle if facing down
- Easy weld the tri-2x1x2 on the back so the triangle is facing up
- Axis the two tri-2x1x1 phx frames on the sides
Wire Stuff
- Attach two propellers (the ones with three wings) as wire wheels to the ends of the top of the tri-2x1x1 with the rotation speed maxed out
- Attach a seat to the front and link a wire adv. pod controller to it
- Put four wire thrusters to make it go forwards, three for back, and one on each side corner for turning, all with maxed out force
- Put two wire hover balls spaced out a bit on the front, and two on the back
- Wire the thrusters that make it go forwards to the adv pod controller's output of W
- Wire the thrusters that make it go backward to the adv pod controller's output of S
- Wire the thrusters that make it go left to the adv pod controller's output of A
- Wire the thrusters that make it go right to the adv pod controller's output f D
- Make two wire if then else chips, an addition chip, and a constant value with three values(1,-1,&0)
- Wire one if then else chip to the adv pod controller's output of mouse two, adn the other one to the adv pod controller's output of mouse three
- Wire the one connected to the mouse three to -1 of the constant value and the else of it to the 0 of the constant value
- Wire the one connected to the mouse two to 1 of the constant value and the else of it to the 0 of the constant value
- Wire the add chip to both of them
- Wire all of the hoverballs' ZVelocitys to the add chip
- Wire the hoverballs' Hovermode to the adv pod controller's output of active
- Wire the propellers' "go" to the adv pod controller's output of active
- Attach a wire hydraulic to the center part of the tri-1x1x2 closest the main body of the osprey to the bottom cormer of the tri-2x1x1 wing
- Do the previous step to the other side
- Attach a wire hydraulic to the center part of the tri-2x1x2 closest the main body of the osprey to the bottom corner on the back of the tri-2x1x2
- Do the previous step to the other side
- Open up Expression 2 and type the following code
- @name Osprey Movement
@inputs Ww Ss @outputs WinglengthF WinglengthB @persist @trigger if(Ww==1) {WinglengthF = 55 , WinglengthB = 5}
if(Ss==1) {WinglengthF = 5 , WinglengthB = 55}
if(Ss==1 & Ww ==1) {WinglengthF = 33 , WinglengthB = 33}
if(Ss==0 & Ww ==0) {WinglengthF = 33 , WinglengthB = 33}
- Wire the exp2's Ww to the adv pod controller's output of W
- Wire the exp2's Ss to the adv pod controller's output of S
- Wire the length input of the back hydraulics to the WinglengthB of the exp2
- Wire the length input of the front hydraulics to the WinglengthF of the exp2
- Wire some sound emitters on the bottoms of the propellers to the adv pod controller's output of activefor added effect
- Weld some 90 deg phx frames as legs in a position where the whole craft is balanced
CONGRATS! Congrats to me, for making the second longest gmod wiki tut on the site, and congrats to tyou for having the patience to make this wonderful V22 Osprey.
Customization
- You can probably make this look better, but how it is, it is strong, durable, and functional!
P.S. If anyone reading this knows how to make the wings tilt opposite directions when turning, message me on steam, my username is Mr. Hankey The Christmas Pooh, and I would rather you leave a comment on my page than message me. Thanks!
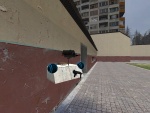
Contraption: {{{minge-rocket}}}
Page white text.png Description:worlds easeiest flying contraption -
link=User: Original Author: a mostly harmless troll
Calendar.png Created: Unknown
Page white text.png Notes:can only go up and down(um,i cant get the template working,little help?) -
Construction:
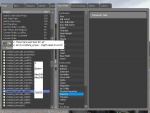
- first spwan any prop you can stand on stably
- then equip physgun and stand on the prop
- grab he prop with the physgun and bring the part towands you whith the mouse wheel while looking down
- you will imedietly rocket straight up
- great for starting airbases or getting away form minges
Swed-Boat
| Air Vehicles: Swed-Boat |
| Flying/surfing/racing machine! Easy to build. | |
| User:Erty | |
| | 27. July 2007 |
| | - |
Construction:
- Spawn an airboat (with or without gun)
- Spawn 2, 435 powered balloons on each edge of the airboat
- Weld the balloons to the airboat
- Change material and color of it
- Add thrusters if needed to gain higher speeds
Because of the balloons, the airboat is so light that it will begin to lift of when you gain enought speed. Great for surfing and racing and aero-war!
{{Medik's Creations/Contraptions}} Name: Amazing Flying Airbat Racer! Author: MedikSmokesABong Date: December 11, 2010 Description: An Airboat that can fly, race and skid across water! no hoverballs needed! Materials: An Airboat, 5 Dumpsterlids (everyone has them), And 3-4 thrusters (depending on variation).
!!!<<<NOTICE: ALL THRUSTERS SHOULD BE SET TO FULL (10000) OR ELSE IT WONT HAVE ENOUGH POWER!>>>!!!
<<{{Construction}}>>
1st you'll need to spawn an airboat, 5 dumpster lids. (just type it in the prop search bar and it should pop up). Easy Weld 2 Dumster lids, latch side in, to each side of the floaty things on the airboat, and tilt them slightly upwards. (it will give you better lift). Now take another and easy weld it to the to of the cage on the rear on the back of the airboat, HORIZONTALLY. (so it somewhat "jets-out".) then take the remaining 2 Dumpster lids and weld them the the "jetting-out" parts of the dumpster lid up top. Remember to tilt them up a little also. (NOT TOO MUCH OR YOU'LL DO BACKFLIPS ONLY!!!). Now for the thrusters, attach two with the 8 and 5 keys set 8 foreward and 5 backward. and atach them to that small section below the fan of the airboat. those are your take-off thrusters. now, add one with 4 as foreward and 6 as back, that will give you altitude. <<((PLEASE READ THIS NOTICE OF VARIATION))>> Now take one more thruster with + (plus) as foreward and - (minus) as backward. Put it on the far back of the air boat on the underside, in the middle. This will keep you from doing backflips if your a horrible construction worker like me.
airboat plane
| Air Vehicles: airboat plane |
| how to make a more manouverable airboat plane. Easy to build. | |
| user:TommyGun | |
| | 3/7/07 |
| | - |
Note: Needs PHX models
Construction:
- Spawn an airboat and a sheet of PHX plastic (2x3)
- Centre the airboat PRECISELY on the sheet of plastic and weld.
- For forward thrust, add two thrusters on the rear set to power 4000.
- For lift, add on the front corners of the underside 2 thrusters set to 1000.
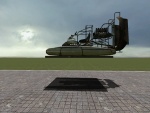
Jump jet M.K.1
| Air Vehicles: Jump jet M.K.1 |
| This takes quite a while to build but it is well worth the effort. It is easily controllable, Sturdy and It has many useful modifications, including but not limited to aerial combat. | |
| Anonymous | |
| | Unknown |
| | - |
Construction
- spawn a hollow red shipping container ("models/props_wasteland/cargo_container01b.mdl" )
- Attach 2 or 4 ( your'e choice )Wheels (saw blade, forward-enter backwards-plus) with torque 10000 and friction 26-32 to the long sides.
- use physical properties, material concrete weight toggle off, on the container and wheels.
- spawn 2 or 4 gas pumps, found in the useful props section, and physical property them the same as the container.
- easy weld them to the wheels being careful not to weld them to the container.
- Weld together the two gas pumps making sure they are facing the same way first.
- attach a thruster ( soda can )to one side of the pumps with power between 300 and 400, forwards 0.
- keep upright the metal container 5 times with angle limit 10000.
- at the front left and back right add thrusters ( soda can ) with power 300, forwards 6 backwards - and at the front right and back left add thrusters, forward 4 backwards - )
controls
- To go up aim the gas pumps down ( using enter and plus ) and press 0
- To go forwards aim the pumps backwards and to go backwards aim them forwards (like a jump jet)
- steer using 4(left) and 6 (right)
please note: don't change the angle of the pumps whilst holding 0 or they will spin out of control!*
Modifications
All mingebot ( in war machines ) modifications can be added to this Jump jet. if anyone has any suggestions for more modifications please add here...
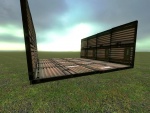
Combine Aircraft
| Air Vehicles: Combine Aircraft |
| A moderately hard to make aircraft. | |
| Mathias4x4 | |
| | 6 December 2006 |
| | - |
Requirements
- Combine_barricade_med03b
- Combine_barricade_med04b
- Combine_barricade_tall02b
  |
Construction
Body
- Weld the Med03 and med04 together like in the picture shown. You can use easy weld on the wings so that they are as similar as possible to the picture. You can then fine tune them with the physgun and then weld.
- Add the roof straight on like the picture. Weld together.
  |
Thrusters and Hoverballs
- Spawn a Pulley wheel or something that can be used to straighten out the thrusters and weld where you would like them (this step is optional).
- Spawn thrusters as shown with optional power settings.
- Add some hover balls to favored positions (possible positions in picture below).
   |
Customization
- Paint different colours or use more advanced items and make better looking wings.
- Combine barricades are great for this stuff.
- If the vehicle tips and rolls spawn a pole or something to make the length longer then the width.
File Cabinet Space Pod
| Air Vehicles: File Cabinet Space Pod |
| Try your skills with 6 degrees of freedom in no gravity. | |
| plams | |
| | 6 December 2006 |
| | - |
Construction
- Spawn 3 file cabinets and freeze one of them mid-air with your phys gun.
- Easy weld them together to make a plus-shaped structure. Accuracy is important. Look at the picture.
- Arrange 14 thrusters and give them the control keys that are shown on the picture. Use force=10 for the those with coloured arrows and force=30 for the thrusters with black and white arrows. Again accuracy is important. Try to attach all the coloured ones with equal distance to the file cabinet edges. The black/white ones must be arranged as close to the middle of the face as possible.
- Spawn a pod and mount it with easy weld in the front as shown on the picture. Accuracy!
- Now use the physics property tool and remove the gravity from everything. File cabinets, the pod and all the thrusters.
- Unfreeze the frozen file cabinet.
- Put on "An der schönen blauen Donau" and enter.

Controls
Take a look at this page: 4/6 is roll. 7/9 is yaw. 8/2 is pitch. +/- is thrust forward/backward.
Known problems
The physics engine seems to sometimes lag or not respond correctly.
D0g Flying Camera
| Air Vehicles: D0g Flying Camera |
| A somewhat useless ragdoll suspended in the air. I'm pretty sure it has a camera or something. | |
| Danm36 | |
| | 9 December 2006 |
| | - |
Construction
- Pose a dog into a pose like he is parachuting (Make sure all 4 ends of 'arms/legs' touch the ground)
- Statue him
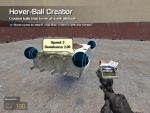
- Add a hoverball with a speed of 2 to the top of his back
- Add one to where his 'legs' join his body
Customization
- Add thrusters in needed positions for controls
- Add a laser where his eye is (Script needed)faceing down a bit
- Add a camera to the position of his eye to have an ASV (Airborne Surveillance Vehicle)
Super Rocket Version 1
| Air Vehicles: Super Rocket Version 1 |
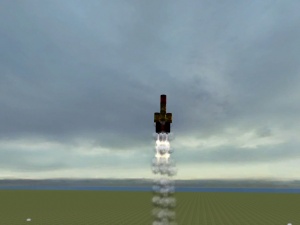
| A rocket with one of the most perfect and straightest launches! | |
| grunt211 | |
| | 12 December 2006 |
| | - |
Requirements
- 12 Explosive Barrels
- 9 thrusters powered at 4163.479(we will add them later.)
Construction
- Take 4 barrels and put them on top of each other as best as possible.
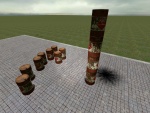

- Weld them.
- Take 4 more barrels and put them like this:
- Weld them on all other barrels.
- Take the 4 remaining barrels and put them on top of the previous 4 barrels like:
- Weld to ALL barrels! (welding to all barrels keeps the rocket more stable!)
- Duplicate your rocket so far. (in case your rocket explodes if you move it).
- Add thrusters underneath the rocket like so(make sure you only have one set selected. Do this by clicking on the set in the second panel to make it deselect.):
- Duplicate!
- Color your Rocket however you want. This is how I colored mine:
- Duplicate your finished rocket.
- Now your Rocket is complete. Use your thruster set to upward to fly.
Videos
02browns: Here is a video i made of these rockets in action, based on the design above. Gmod Rockets
S.C.A.A.V
| Air Vehicles: S.C.A.A.V |
| Shipping Crate All-purpose Aerial Vehicle | |
| TommyGun | |
| | 7 January 2007 |
| | - |
Construction
- Spawn an open-ended shipping crate. This will be the main body of the craft.
- Next spawn the items that are to be the wings. These could be up-ended metal desks or something from the Phoenix Model Pack.
- Now weld these wings on so they are about a third of the length of the shipping crate away from the front (which will be the closed end of the crate).
- Next, the propulsion system: Use two to four thrusters on the wings for forwards and backwards motion (recommended 10000 thrust)
- To steer add two thrusters on the tip of each wing, on a different key setting (the right side with keys 4 + 6, the other side 6 + 4) Note that the key functions on one side MUST be inverted to the others.
- So it flies, add 4 thrusters (strength 20000 thrust on 600 gravity) to each corner of the bottom of the shipping crate.
- To stop it tipping, use the keep-upright tool on the fighter.
- For transporting yourself safely, add a pod to the front or top of the fighter
- Mount shields in front of the pod to protect from missiles.
Customizations
- Add a cockpit (simple transparent box with a door/gap)
- Add weapons (e.g. Turrets, Cannons, Harpoon Launchers)on the wings.
- Add extra pods inside to turn it into a transport
- Add an Escape Pod
- Add steps so the top can be accessed (extra transport space)
- Magnetise some bombs (from Phoenix Model Pack) and attach them to the sides of the craft, so that you can bomb an enemy.
- Place the thrusters perfectly and distrubute weight perfectly so that Keep Upright is not necessary.
Assault Craft
| Air Vehicles: Assault Craft |
| An airborne craft capable of holding lots of people as well as you | |
| TommyGun | |
| | 25 January 2007 |
| | - |
Construction
- Spawn 4 large blast doors
- Weld them together to form a long strip.
- Duplicate this construction.
- Weld the duplicate so that it is upright, attached to the base.
- Duplicate this.
- Weld the two halves together, forming the body.
- Add pods to the walls.
- Add an upright door to the front of the craft, and weld a pod to this.
- Add thrusters of the necessery power, both for turning and for thrust forwards/backwards.
- Add hoverballs, with air-resitance set above 0.5 and a speed of about 3-4.
- No-collide every single piece for saftey, and weld every piece to each other so their is no flexing of the superstructure.
- Optional Additions:
- Make parts of the floor transparent, so that you can see the enemy underneath. - Add a cockpit to the front, to protect the pilot. - Add weapons systems (e.g Malawar's harpoon/cannon/launcher pack, Turrets) - Double the size of the craft by duplicating the main body (see example)
As well as being able to deploy your team into an enemy base, you can simply land on people, or fly at them at a low altitude.
| 
| 
| 
|
Escape pod for air vehicles
| Air Vehicles: Escape pod for air vehicles |
| The name says it all | |
| TommyGun | |
| | 30/1/07 |
| | - |
Construction
- Weld the pod to wherever it is needed, with a weld strength of 100 000 (type into the box provided)
- Add thrusters (the coke can ones) to where it can best be fit (if added to the back of the pod, add before welding) of strength 500 000 (add many of these)
- Now you are done. Use with any air vehicle.
I Fortress
| Air Vehicles: I Fortress |
| A small fortress in the sky | |
| TommyGun | |
| | 30/1/07 |
| | - |
Construction
- Spawn two shipping crates (hollow)
- Weld together end to end, so the open sides face outwards.
- Add steps around to the top of the crates, making sure they are no to close to the join. These will allow access to the crates, as storage etc.
- Weld a non-hollow shipping crate so that it is perpendicluar to the length of the construction. Make sure it is in the middle of this side.
- Duplicate the whole lot.
- Weld the duplicate onthe the end of the closed shipping crate, giving the I shape.
- Add thrusters for movement.
- Add hoverballs to multiple places so that the fort will not bend in the middle.
- Add pods into one of the crates, or on the top, so that the crew will survive ascent/descent.
- Add weapons.
- Add armour to points, so that you can fire down onto tragets without taking injury.
- Customise!!
A balloon!
| Air Vehicles: A balloon! |
| What do you think it is? | |
| TommyGun | |
| | 30/1/07 |
| | - |
Construction
- Spawn a blue dumpster
- Add steps inside and out so that you can see out and access the inside/outside.
- Create some weights (eg filing cabinets, breeze blocks, cars) [You could also youe the 'Weight' Tool]
- Freeze the dumpster, and add balloons of strength 1000 to each corner, until it starts to rise. If you have no weights, and want to rise slowly, put two 1000 strength balloons and one 500 strength balloon on each corner.
- Make the balloons invisible with the Colour tool to stop people from shooting them.
- Remove weights if you wish, to control altitude.
- If admin, change the wind values to move around, or use thrusters.
- Customise (e.g. fill with bricks and drop them on people!) [You could also use the 'Prop Spawner' tool]
AirCraft/Hovercraft
| Air Vehicles: AirCraft/Hovercraft |
| Incredibly simple flying machine... | |
| Master Yoda | |
| | 30/1/07 |
| | - |
Construction
This "aircraft" is incredibly easy to make, and is a good beginner's air vehicle, as well as a good substitute should your version of Gmod not do everything the others can(*cough*mine*cough*).
- Spawn an airboat, or grab one of the ones inside the building behind where you spawn.
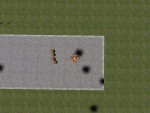
- Place thrusters on each side and under the airboat, at 3840-ish power (the airboat will go out of control if the thrusters are not in the exact right spot, so I included screenshots.)
-- I went under the airboat when it was in the water, to place the two bottom thrusters. -- The bottom thrusters can then be used to lift the boat up, and the left and right ones to control rolling, and to flip the boat over if it crashes. PLEASE NOTE that it will take some time getting used to flying with such a simple device, as it will most definetly get out of control once or twice.
- You can do whatever else you like with it, and I'm sure that this can be done with the dunebuggy as well, but it might require more thrusters.
-- In order to get used to this vehicle, and just to screw around, I spawned mass amounts of Manhacks and simply flew back and forth smashing through them. -- I will most likely continue to edit this craft and post new things about it here, until it is fully functional and controllable, with features such as weapons systems (I hope), pitch(Up/down), etc etc.
 |  |  |
Basic Helicopter
| Air Vehicles: Basic Helicopter |
| Really cool helicopter | |
| Unknown | |
| | 25/2/07 |
| | - |
Intro
This helicopter was originally posted on the Gmod 9 Wiki. I checked it's integrity and put it on Gmod 10 wiki. The wiki then crashed. So here it is again, a basic helicopter based (off memory) off of the gmod 9 wiki
Required Parts
- 4 metal ladders, for the rotor
- 3 metal ladders, for the feet/tail
- 1 locker door, for the tail rotor
- 1 tram bracket, just search 'tram', for the body
- 1 pod
- 14 thrusters for optimum performance, double check you can use that many
- 1 balloon
Construction
Step One
- Get the 4 ladders
- Freeze one on the ground
- Use easy weld to weld another one onto it, at a 90 degree angle
- Continue easy welding until you've created a four-pronged rotor, shaped like a plus sign ( + )
- Unfreeze
- Weld it all together for extra stability
Step Two
- Get the tram bracket
- Align it upright and freeze it about 5 feet off the ground
- Get the remaining 3 ladders
- Easy Weld two of them onto either 'foot' of the tram bracket. Make sure they face forwards and are on the inside of the tram bracket. See finished picture
- Easy Weld the remaining ladder, at the tip, to the bar in the middle of the tram bracket. This will be the tail
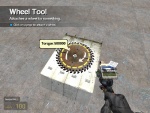
- Use the wheel tool to attach a large tractor wheel to the top of the tram bracket. Give it the + and - keys as controls. Give it 3000 torque. Give it a maximum force of 10,000. Make sure 'Toggle' is selected
- Position the pod so the top is touching the bar in the middle of the tram bracket. Weld it to the skids and the tram bracket.
Step Three
- Use the wheel tool to attach a wheel to the very end of the tail, on the side. Make it a sawblade but give it the same settings as the other wheel.
- Easy weld the locker door onto the saw blade
- No collide the locker door and the tail
- Easy weld the main rotor (4 ladders) to the top of the tractor wheel. It is recommended that you freeze the wheel in advance.
- Add extra welds between the 4 ladders and the tractor wheel.
Step Four
- Freeze both wheels
- Add two thrusters at each tip of the four ladders. Set the key to 0, the force to 950, make sure toggle is NOT selected.
- Add two thrusters to the tip of the tail ladder.
- Add two thrusters at opposite corners to the locker door's left side. Set the key to 4.
- Add two thrusters at opposite corners to the locker door's right side. Set the key to 6.
- Add a balloon to the main rotor wheel. Set its force to 4000 and rope length to 15.
Go Fly!
Now it's finished. Unfreeze it and press + to start the rotor blades turning. Wait till they're up to speed. Then, you can get in. Press and hold 0 to lift off and move forward. Use 4 and 6 for steering. Now, go fly and have fun, as it's a wild yet enjoyable ride!
Customization
Several things could be added/changed about this model.
-- Set the balloon's colour to invisible. This helps keep people from shooting it and making you drop out of the sky -- Attach a RT Camera to the back of the pod, so that you can remote fly it. -- If you want some camoflauge and you've put an RT camera on the back of the pod, you can change the material of the copter. Set it all to RT Screen and you'll have instant camoflauge! Wherever you land, it'll change to reflect that! -- Attach bombs. See other tutorials about this. -- Add more pods for transport. Remember to up the balloon strength by about 950 per pod. -- Add turrets to the front of the skids. -- Attach floats to the skids. This will allow for water landings! -- Put shielding, such as metal doors, around the pod for safer flights.
Conclusion
This is a great vehicle for most purposes. It takes some time to create. However, if done well, it's got great control and looks real cool. It's definately a great vehicle on any battlefield, though you may wish to add shielding around the pod.
 |  |
Basic thruster Plane
| Air Vehicles: Basic thruster Plane |
| Really cool Airboat plane | |
| Ko-unit >ll< GAH/Biz | |
| | 23/3/07 |
| | - |
Introduction
This is a really cool plane that Biz came up with and i've changed a bit and now putting it in here because it isn't and i reckon everyone should now how to make it! It uses 2 props 1 Airboat, a camera, no mods and 9 thrusters. The plane takes ages to master(like I have) but once you're able to fly this baby you'll find yourself making it on public servers and trying to impress with front flips, barrel rolls, back flips and more!
Getting started
For the plane you'll need a map where the roof of the map is very high. A good example is gm_flatgrass because everybody should have it! You'll need to have some perseverance and to have not deleted any of these tools, weld, easy weld, thruster and camera.
Building
WINGS
To start off spawn 1 airboat, 2 metal fence doors(at the fences at the bottom). Freeze the airboat just off the ground so if you stand normally you can see under to the other side but still see the shadow. Then whip out your easy weld tool and weld the 2 fence doors on the side of the handle, on the flat side to under the airboat's chair on the yellow thingy. using the shadows make sure the 2 fence doors are in line with each other and not tilting a bit.
CAMERA
Now for the camera. The settings need to be set to toggle as checked, the key to something you can remember just not4, 6, 5, 8 or/ and static NOT checked. Next go diagonally up behind the airboat so that you get a view that sees over the airboat but still tilts down a bit. Now weld the camera to the airboat and the 2 wings. Also weld the 2 wings together.
THRUSTERS
This is the longest bit. OK now get out the thruster tool and put the thruster settings to 5000 power, non toggle, non hurt thruster, set the key to 8 and whatever settings for visual and sound. Put the thruster at the very end of the airboat, at the nose in the middle. Now have the same settings but the key as /. Put it right next to the first thruster. The reason for that thruster is so that if you do a flip or get hit by something and you end up with the nose of the airboat down you can use it to even it out. This next thruster is put on the back of airboat for the same reason as the last thruster just if it the airboat nose was up, set the key to 5. Now for the roll thrusters, the most fun thing to use on this plane(if you ask me). Set the power of the thrusters to 500 and key 4. Go BEHIND the airboat and then go to the wing on the RIGHT and put the thrusters on the very corners of the wing. Do the same for the other wing but the key needs to be set to 6.
CHANGING
If you're Gonna change this baby, say put a harpoon or a cannon on make sure the weight isn't too heavy otherwise the whole plane might spazz or flip over A LOT. Oh and DON'T use cannons with drawback like Malawar's heavy cannon. And use the harpoon gun only to kill not drag because it's not very powerful at dragging :P, well i guess you could put a few thrusters on the back for turbo and make them not very heavy. Hmmmmmmmmmmmmmm.........
TROUBLESHOOTING
If the plane won't stay stable make sure that the thrusters are all the right power, not toggle and not hurt thrusters. Also make sure that all added weight is not heavy. other than that I guess you could make it again after I've put in pictures of the steps to make it easier.
A Simple Plane
| Air Vehicles: A Simple Plane |
| Fairly simple and balanced plane. | |
| Mr.Sexy's Friend | |
| | 30/3/07 |
| | - |
Introduction
This is a pretty sweet plane that my friend designed. You can do a lot of stuff with it and add things to make it do tricks, such as barrel rolls or loops.
Getting Started
You'll need these tools in order for the plane to work properly:
-Weight Tool (A MUST have, otherwise plane will simply sink down the whole time.)
-Smart Weld Tool (Makes the plane sturdier.)
-PHX model pack (for airboat seat)
Building
First off, spawn the longest dock pole. (dock_02_pole02a.mdl)
Then spawn a signpole. (signpole001.mdl)
Spawn two flat soda machines
One blue barrel
Easy Weld them together as shown in the second picture.
Weld the metal pole to the wooden pole. Weld the wings right in the middle of the wooden pole and make them almost the same height on it too. Weld the barrel to the back so the black side is sticking outwards. Weld the seat between the wings. (make sure it is facing the metal pole. That's the front.) Use easy weld for all this!!! Then smart weld all the objects together. Take the weight tool and make the weight of every object there 1KG. (value of 1) Don't weight the thrusters that are coming up, though. Somehow, it screws them up.
Now comes the harder part, because you need to be really precise with thrusters on planes. Wings:
Look at the picture for much better reference. Set the thruster force on the wings to around 317 and make the pull key the corresponding direction. (I.E: You would set the thruster on the right wing with the pull key of 6 on the numpad.) Disable the push key by pressing on it until there is no key selected for push. Set the "6" pull key thruster on the right wing, and the "4" pull key thruster on the left wing.
Going Forward: Go to the barrel on the back.. You have to be REALLY precise with this part, otherwise, your plane will end up turning slightly in another direction when you're only pressing forward. Follow the picture to see what I mean.
Now take a thruster with a force of 1000. Make its push key "8" and disable its pull key. Put the thruster precisely in the middle of the black top of the barrel.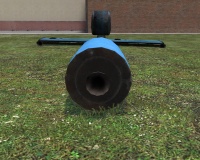
Lifting the front up:
In between the wings and the front end of the wooden pole, make a thruster with a force of 200 and a push key that you'd use to tilt up and a pull key that you'd use to tilt down. Don't use "8" for the push key, since you'll be going up and forward at the same time that way. Look at the picture for more explanation.
Finally Finished! Now that you're finished, you can fly around and even add some new things.
To do barrel rolls, as far as I can remember... You take two thrusters with a force of 600 and you place it on top of the left or right wing, and set its keys to rolling keys, such as 7 and 9. Use those when in air, and have fun!
©2007 Mr.Sexy
air to air missile
| Air Vehicles: air to air missile |
| a simple missile | |
| ninjabunny | |
| | 1/8/07 |
| | - |
Notes
You will need PHX models pack and the constraint breaker tool to make this missile. this needs a lot of accuracy to make sure that it will fly straight.
Construction
1) spawn the thin white missile from phx i think it's called amraam 2) weld a locker door to your aircraft 3) weld the missile to the locker door 4) attach thruster at maixum thrust with toggle on 5) put a constraint breaker on locker door set to the same button as the thurster
Notes
attach constraint breaker do locker door so the thruster dosn't fall off
Combine Helicopter
| Air Vehicles: Combine Helicopter |
| A replica of the Combine Helicopter | |
| mr g | |
| | unknown |
| | - |
What you need
1. The Combine helicopter prop found under "HL2 Vehicles"
2. A pod vehicle
That's it!
How to build
1. First, freeze the helicopter prop in the air as straight as you can.
2. Now get the Hoverball tool and select the settings of you like and the keys for the helicopter to go up and down. Place one at the tail, one at the middle, one on each wing and one below the cockpit.
3.Now get the Thruster tool and again select the settings of you prefer (remember, the more force you select the faster and the more unstable the helicopter will be), then select the keys the helicopter will use to go foreward and backward, and place them on the tail (the less power the more thrusters needed). If you have to place lots of thrusters Be sure to place them in a semi-circle shape around the rotor.Then select at "push" the key you want to use to go right. Make sure that there isn't to much power selected and place it on the tip of the left wing. Then do the same thing but select the "push" key to the key you want to use for left and place the thruster on the tip of the right wing.
4. Spawn a Pod from the vehicles tab and easy weld it's back to the front of the cockpit.
5. Add weapons of choice.
I suggest you spawn a Turret with the settings you on the front of the helicopter's gun, and another one, binded to a different key, below the gun. Also, If you have Malawar's cannon STOOL you can place a heavy bomb bay cannon in the middle of the helicopter. Or, you can also use the Prop Cannon STOOL with the helicopter bomb selected as ammo.
All done!
This contraption is a little unstable to fly because it "glides" due to the hoverballs. You can play with the air resistance of the hoverballs until you find a setting you like.
Hover Jeep
| Air Vehicles: Hover Jeep |
| A flying "Jeep" | |
| Lord Vipes | |
| | 12/28/07 |
| | - |
What you Need
1x Jeep
4x Hoverballs
At least 5x Lampshade Thrusters
Construction
1. Summon a Jeep.
2. Using the physics gun, freeze the model in place, you could put in air, but not preferred.
3. Add at least one Thruster in the middle of the back of the Jeep, or the AmmoBox. Full thrust. You can add more, but might offset the balance. Keep the one on the AmmoBox visible, and turn the rest invisible
4. Add weaker thrusters on the sides of the Jeep. Back ones just above the back wheels, and the front ones above the front wheels. Make them invisible
5. Add a Hoverball to each corner of the Jeep. Make them invisible.
6. Enjoy your flight!
Extra Stuff
If your stuff is prone to being stolen, Attach dynamite.
1. Put one dynamite on the front of the Jeep. Make it invisible.
2. Put one dynamite underneath the Jeep. Make it invisible.
3. Put one dynamite behind the Jeep. Make it invisible.
4. If someone tries to take your Hover Jeep, blow them to smithereens!
For a more "peaceful" solution, you can attach a wire advanced pod controller and link it to the jeep, then a numpad imput. You can then wire some "punishments" like (health damage or weapon restriction) from the pod controller to the imput.
Notes
Will be more detailed next time I am on GMod.
Heli Hover Platform
| Air Vehicles: Heli Hover Platform |
| A somewhat simple hover platform that performs like a helicopter. | |
| RockerDoofus | |
| | 11 September 2009 |
| | - |
Before Beginning
Keep in mind this contraption flies just like a real copter and it is hard to control. Small adjustments will do best when flying.
What You Need
- 1-----phx 2x2 metal plate
- 2-----phx metal beam 4
- 1-----airboat seat
- 22----thrusters
- 1-----advanced pod controller
Construction
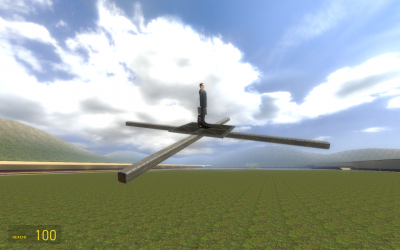
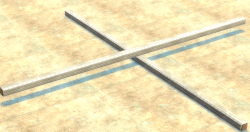
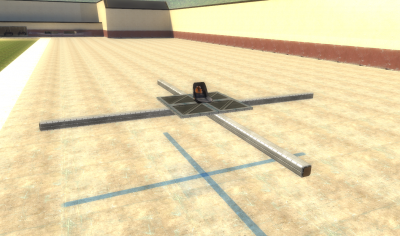
1. Spawn phx iron beam 4, which is the longest beam in phx misc. Anyway, shift E and freeze it on the ground. Freezing it on the ground is important because we will use the ground to align the two beams.
2. Spawn a second beam and easy weld it to the center, perpendicular to the other beam and freeze it.
3. After it's frozen undo the easy weld.
4. Now whip out the nocollide tool and nocollide the two beams.
5. After the undoing of the weld and the nocollide has been applied, unfreeze the second beam and let it fall in place.
 |  |  |
 |  |
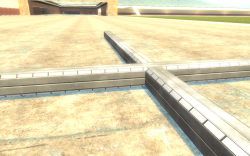
6. Weld the two beams and presto, a very nice looking cross beam thingy. Now, shift E and freeze the beams.
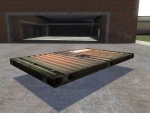
7. Spawn a phx 2x2 metal plate and shift E and freeze it. Easy weld it to the center of the cross beam thingy and freeze that off the ground to apply some thrusters.
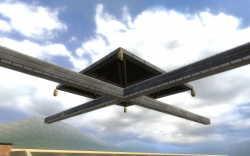
8. Pull out the Wire thruster tool and put four thrusters on the four corners of the metal plate. The settings for those thrusters are as follows: "MODEL = the soda can or phx soda can", "whatever effect you would like","same as over water", "Force multiplier = 465", "Force minimum = 0", "Force maximum = 10000", "bi-directional UNCHECKED", "collision UNCHECKED", "sound DISABLED", "Works out of water CHECKED", "Works under water WHATEVER YOU WANT". The rest of the thrusters are the same except for the force multiplier.
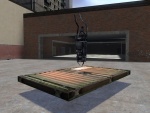
9. Spawn a seat and weld it to the center of the top of the metal plate. Shift E to make sure it is aligned with the beams.
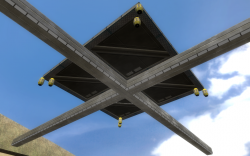
10. Put four more thruster on the bottom of the metal plate. You will make an x with the thrusters on the metal plate. Put four thruster on the top of the metal plate the same as the last four thrusters. Force multiplier = 80.
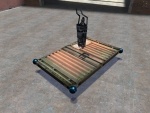
11. Ok, now add some thrusters to the ends of the beams. One on top and bottom of the beams. The thrusters should be at a 45 degree angle to the beam. Total of eight thruster on the beams now. Force multiplier = 80.
12. Place two more thrusters on the beam that is behind the seat. These thrusters will be controlling the yaw so they will need to go on the sides of the beam. Force multiplier = 160.
13. Finally, slap an advanced pod controller to the seat and link them.
Wiring
1. Wire the four corner thruster on the bottom of the metal plate, to "ACTIVE" on the advanced pod controller.
2. Wire the other four thrusters on bottom, to "SPACE" on the pod controller.
3. Wire the four thruster on top, to "SHIFT".
4. Wire the thruster on the TOP, FRONT beam to "W" on the pod controller, and wire the thruster on the BOTTOM of the BACKWARD beam to "W".
5. Now wire the FORWARD, BOTTOM thruster and the BACKWARD, TOP thruster to "S".
6. Wire the LEFT, TOP thruster and the RIGHT, BOTTOM thruster to "A".
7. Wire the LEFT, BOTTOM thruster and the RIGHT, TOP thruster to "D".
8. Wire the two yaw thruster to the mouse respectively. The left thruster will go to "MOUSE1" and the right thruster will go to "MOUSE2".
9. Now get the nocollide tool and right click all the thrusters.
10. With the color tool, set the transparency all the way down and color all the thrusters.
Completeness
Now the wiring should be complete and it should fly.
Controls
"W"------------Pitches nose down
"A"------------Rolls left
"S"------------Pitches nose up
"D"------------Rolls right
"Space"--------Ascends
"Shift"--------Descends
"Mouse 1"------Yaw left
"Mouse 2"------Yaw right
Blast door hovercraft
| Air Vehicles: Blast door hovercraft |
| This is one of the most basic flying contraptions that exist, and also one of the most efficient. | |
| Anonymous | |
| | Unknown |
| | - |

Construction
- Start by spawning a long blast door.
- Pick it up with the physics gun (the blue one) and while holding 'use', rotate it so that it would sit flat on the ground (parallel with the ground).
- Spawn a pod and repeat the above so that it is lined up with the blast door, perpendicular (pointing up) and weld it above the blast door so that it is in the very middle facing down one of the long ends.
- Then, get out your Hover-ball tool. Set the speed to 1, friction to about 3 (This keeps it from spinning off into space when you fire a thruster), lift to minus sign ( - ), and lower to plus sign ( + ).
- Place a Hover-ball on each corner of the blast door.
- Go to your thruster tool and set the power to 1000, set the forward key to 8 and the reverse key to 5. Place one thruster on the short end of the blast door, behind the pod.
- Then, bind forward to 4 and reverse to 6, and place a thruster to the front-right hand side in front of the pod on the edge of the blast door next to the hover-ball.
- Switch the binds and place another on the opposite side of the blast door.
   |
Controls
Press the minus key to raise, plus key to lower, keypad 8 to accelerate, keypad 5 to brake/reverse, keypad 4 and 6 to turn. The rest is up to you.
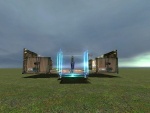
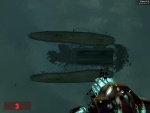
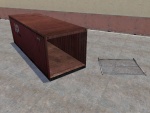
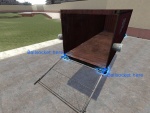
Advanced Space Ship
| Air Vehicles: Advanced Space Ship |
| A flying container spaceship with a hinging ramp. | |
| Meatwad | |
| | Unspecified |
| | - |

Construction
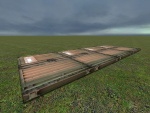
Outer Shell
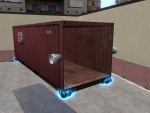
- Spawn a hollow red shipping container ("models/props_wasteland/cargo_container01b.mdl")
- Use the keep upright tool on the container with an angular limit of 10000
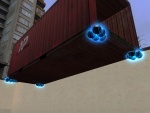
- Attach 5 hoverballs to the bottom corners of the shipping container. (A possible variation is to put them on the top of the container)
- Add thrusters to the back of the container (the flat, non-open end); the original instructions said to use four thrusters with a force of 4000-5000. You could probably use a single big thruster with force 16000-20000 instead. This will control the forwards/backwards motion; so set the push/pull keys to something appropriate (8 and 5?).
- Add thrusters to the front-right of the container to allow for steering. I used a thrust value of about 4000. Set the push/pull keys to 6 and 4 respectively.
- Now do the same to allow you to steer left; add thrusters opposite the last set on the front-left of the container; and use the key binds 4 and 6 respectively.
  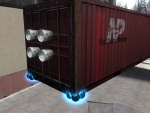  |
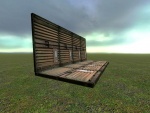
Door
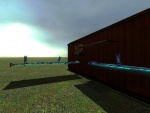
You can also add a folding down door to the open end of the ship. (This is optional)
- Spawn a wire fence from the Useful Construction Props category ("models/props_c17/fence02a.mdl") -- near the top of the prop listing.
- Position the fence so that it forms a ramp at the bottom of the opening of the container and lock it in place using the physics gun. Leave a small gap between the fence and the container (see the images).
- Now use the ball-socket tool and click the corners of the fence and the nearest part of the container on both the left and right side of the fence. This will create a two point hinge between the ship and the ramp.
- We need to add a winch to one side of the ramp so we can raise and lower it. Using the Winch tool with the Increase/Decrease buttons set to 0 and 1 respectively and both rates set to 64, add a winch between the left end of the ramp (away from the ship) and the top left corner of the container.
 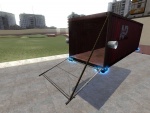 |
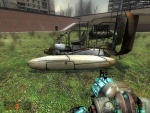
Pod Racer (airboat based)
| Air Vehicles: Pod Racer (airboat based) |
| An airboat based pod racer. | |
| Nixon-X | |
| | Unspecified |
| | - |
Construction
Body

- Obtain a hoverboat.
- Place hoverballs on the front and back of the base and set some memorable controls to up and down.
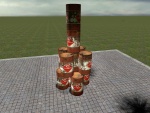
- Spawn 2 large canisters, and place hoverballs on the front, center, and lid.
- For appearance you may want to place cones on the front to make it look more appropriate and to cover the hoverballs.
- Weld a can to the center of each canister and rope them together (use an energy beam looking rope for effect =D).
- Weld a pipe to the top of both the canisters to hold them together (without them it isn't stable).
- Rope the caps of the canisters to the front of the hoverboat's base.
Thrusters
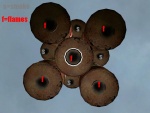
- Add thrusters to the caps of each canister (4000-4500 power, control set to 8, flames/plasma), this is your forward thrust.
- Add a thruster to the left canister on the outside (power 500-100, control set to 6, no appearance), this turns to the right.
- Add a thruster to the right canister on the outside (power 500-100, control set to 4, no appearance), this turns to the left.
Note: you can set the pull of the thrusters to steer (place one and use 4 to go left and 6 to go right) whatever suits you.
Controlling
Maneuvering it may be tricky but once you get the hang of it its easy. 8 to go forward, 4 goes left, 6 goes right and your controls to go up and down.
Customization
- Paint it different colors or materials and use different items (car, custom cans, etc).
- You may want to weld some pipes from the pods to the airboat for added stability.
- You may also want to remove the appearance (color - alpha = 0) of the pipes or hoverballs to make it look better.
Hover Attack Vehicle (HAV)
| Air Vehicles: Hover Attack Vehicle (HAV) |
| A vehicle which flies, and is equipped with turrets, harpoons and bombs. | |
| Jonzay | |
| | 22/01/07 |
| | - |
You'll need the following props/vehicles:
- 1 Airboat.
- 1 Dumpster Lid.
You'll need access to the following tools:
- Weld
- NoCollide
- Keep Upright
- 4 Hoverballs
- 2 Turrets
- Optional: 2 Bomb Launchers
- Optional: 2 Harpoons
- Optional: 1 Thruster.
Part 1:
- Create the Airboat and Dumpster Lid.
- Use Shift E to straighten the Airboat, and freeze it in the air.
- Line the dumpster lid up with the airboat, and move it upwards until it just touches the bottom of the airboat.
- Weld the two together.
 |
Part 2:
- Attach a Hoverball to each of the four corners of the dumpster lid.
 |
- Spawn 2 Turrets, and NoCollide them with the Airboat.
- Line them up with the airboat and freeze them in the position shown in the screenshot.
- Weld them to the airboat.
- Make SURE that you weld the turrets to the airboat, and not just weld the airboat to itself.
- Use the Keep Upright tool on the Dumpster Lid, making sure it is straight and lined up when you do.
 |
Optional Componants:
- Attach Harpoons and Bomb Launchers (I used Malawar) to the front and underside of the HAV, respectivly.
- Attach a "Booster" Thruster to the back, for that extra surge of speed.
Now you know how to make a simple 5 minute vehicle, which allows you to hold your own against enemy attacks. Have fun!
Flying building
| Air Vehicles: Flying building |
| A slightly more difficult way to make an ultimate, flying fortress. | |
| Saber Super (of the Umbrella Corp.) | |
| | 25/01/07 |
| | - |
The shell I highly advise to use the phoenix pack on this one! It has straight construction plates which make it easier!
First spawn a couple of the largest plates from the phoenix pack. Make them upright on the floor. Weld them together until you eventually get a square. Now make walls up with the same idea. You would probably end up with 4 X 4 plates per square, and so with 6 squares, form a cube.
Now this looks pretty ugly. Give it a material of cubemap and a nice colour. There, that's better! Now you have built this big cube. Time to delete some parts. At the front, you should remove the bottom right plane and replace it with two planes which vertically make the same plane, this is for the door.
We construct the door with two ballsockets and two winches. Make these winches / and *. They should have the same settings. If the door goes too far, try to block it with an item made invisible and welded to the contraption.
Now add hoverballs to every corner of your neat cube. Now make buttons on the plane next to the door's plane(s). Tie these hoverballs to - and + on your numpad. Play around with the settings. Make sure friction is low or off.
Now you could optionally put an RT screen in for those who know how to do that.
Now place thrusters. I used the door as the front, so I think you should know how to do that for something like this. Again, play with the settings. Make buttons for this next to the hoverballs and the optional RT screen. Make it like the arrows on your keyboard. This is so that when you save and load you can still use it. Also others may use it like this. Have fun Any questions or remarks: [email protected]
Now we want the ability to go to the top floor to shoot from. remove a top plane, do the same as with the door only now 4 winch ropes are nessecary. Make the keys 9 and 3 if you havent used them yet. Make buttons for this on the elevator self, and on the wall next to it and the top floor.
Now you're done! Have fun air-fighting! If you place wheels (APC ones?) you can also drive. If you make the material floaters, you may use it as a boat! Wow!
Ultimate Contraption Mk. II
| Air Vehicles: Ultimate Contraption Mk. II |
| A vehicle with responsive movement and the ability to fly through the map. | |
| BTChaos | |
| | |
| | - |
Wiki'ed from this thread. The save can be found here.
Step 1: Parts
 |
That's it! That's your whole body. Almost sickeningly simple, right? This prop is wonderful because despite its size it weighs over a ton and is difficult to obstruct. The heavier the prop, the better (you can use any prop if the server has a weight changer tool, though :).
Step 2: Steering
 |  |
There will be 3 parts to this to allow it to move:
- 4 hoverballs (one on each corner).
- 6 thrusters (yes you need this many; setting just 1 to a high setting doesn't work for some reason...)
- 1 sawblade wheel.
First though, the steering. This is done with a wheel. See the picture below for settings. To place it, pick the centermost point of the chassis (right on the corner of that little black locker handle slot).
But a wheel will just spin on its own, right? Well to make it turn, simply weld the wheel to the locker chassis, and boom. Now it turns right at its centermost axis, and won't move the contraption about like thrusters will.
Step 3: Hoverballs
 |
Just place them on all four upper corners (be sure to use the settings in the pic).
Step 4: Movement
 |
Finally, to get it to move, you add the thrusters. See the picture for reference. Ideally you want them as close to the same spot in the very upper rear of the locker chassis as you can get. That should be enough for fairly fast movement. You can add more or less at your discretion, of course.
Step 5: Control
 |
Ok, so you can move it around now. But you can't yet see where it's going easily. You need to add a camera. This part is a tad tricky, because you want to keep it as evenly aligned with the rest of your contraption as possible. Once it's in place, you'll want to weld it to BOTH the chassis and the wheel. You'll want this part to be as stable as possible, so the more welds the better!
Step 6: The Fun Part(TM)
 |  |  |  |
 |  |  |  |
Now we get to the goods! First, we start with the primary weapon: The turret. Just smack it right on that camera lens and boom! Instant FP-style gun.
But why stop there? Let's add a Wheel O' Death(TM).
Step 7: Noclip!
 |  |
So we come to it at last! The ancient secret passed down from generations... ok screw dramatics it's a god damn ballsocket. Advanced ballsocket, to be precise. The settings you'll need can be seen in the pic. Simply apply that to every prop on the contraption, and viola! Instant noclip!
Step 8: Stealth!
This is the last (and optional) step. If you want to use this to kill with, but don't want your name to show up next to each kill (or be seen as the owner), then all you need to do is color all of it invisible with the color tool (set the furthest slide bar, the alpha, to 0). Then simply operate remotely it by camera, and use ONLY THE WHEEL.
 |
And there you go! Your very own leet haxor machine. Enjoy!
Basic AIO Vehicle
| Air Vehicles: Basic AIO Vehicle |
| A basic AIO Vehicle. Build time - about ten minutes, give or take. | |
| GeodesicDragon | |
| | 03 October 2007 |
| | - |
Items
6 Blue Barrels
1 Combine Window
1 Seat
4 Hoverballs
4 Thrusters
Knowledge of making things invisible
Construction
1. Using the PhysGun, freeze the window in place a couple feet off the ground. This will make things a bit easier. The window should be horizontal, but I think you know that already.
2. Freeze the barrels in place along the sides of the window, three on each side. Once done, weld them to the window, and unfreeze everything. The barrels should stay in place. Refreeze the whole thing a couple feet off the ground.
3. Get four Hoverballs (set to 0 Air Resistance, 1 Strength and 2.500 Speed, up is 9 and down is 3). Postition two at the front of the craft and two at the back. Make them invisible.
4. Take out the Thruster Tool. You can have effects and sound if you want.
5. For the back, set the thrusters to 8 (push) and 2 (pull). Put the thrusters on the back of the craft. In my video, I place them on the black tops of my barrels, as postioning them is easy.
6. For the sides, turn effects and sound off. The left side is bound to 6 (push) and 4 (pull), while the right is 4 (push) and 6 (pull). This will let you steer.
7. Make the side thrusters invisible.
8 (optional). While you can control the vehicle without a seat or pod, it always helps to have one. Postion it using the PhysGun either in the middle of the craft, or at the back. Make sure to centre it, as it will go lop-sided if it is postioned incorrectly. Once you are happy with the postition, freeze it, weld it and unfreeze it.
9. Done!
Video
Garry's Mod 10 - Basic AIO Vehicle
Customization
You can add turrets, bombs, balloons, etc to the vehicle to make it look nicer, or more lethal. Whatever you do, don't color it! As you will see in the video, it will start to flash, as if it were a strobe light. This can be rather annoying. However, the video is rather old, so this problem might have been fixed.
Controls
Forward: 8
Reverse: 2
Up: 9
Down: 3
Left: 4
Right: 6
Kleiner's Funky Hoverboard
| Air Vehicles: Kleiner's Funky Hoverboard |
| It's Dr. K's lastest experiment! a hover board made with a door and some soda cans | |
| Santy22 | |
| | 04/10/2009 |
| | - |
You'll need the following props/vehicles:
- 1 Civilian door.
- 1 Ragdoll.
You'll need access to the following tools:
- EasyWeld
- 4 Hoverballs
- 7 Thursters
Part 1: Board
- Spawn a civilian door and knock it to the ground
- Set hoverball air resistance to 5, up key 9 and down key 3 and place a hoverball on each corner of the door
- Get some thursters on key 2 pull and key 8 push and place 4 in one of the shorter sides of the door
- Set thursters to 6/4 and place 3 of them in the left side of the door
 |  |
Part 2: The awesome rider
- Spawn a ragdoll
- Easy weld his feet to the hoverboard
- Lift his head til' you think its fine and freeze it
- Weld the head to the board
- Unfreeze
 |
Improvements
- Add front lights (weld lamps)
- Add windshield
- Add a seat to drive it yourself
- Add cameras
- Make thursters and hoverballs transparent
Physics hover-cart
| Air Vehicles: Physics hover-cart |
| A simple and easy to make controllable hovercraft | |
| doggie015 | |
| | unknown |
| | - |
Introduction This is an easy-to-make, fun-to-fly hovercraft that should provide a simple introduction to aircraft making
Requirements You will need: 1x Physics cart
During construction you will spawn: 6x thrusters 4x hoverballs
Optional: 1x Jeep seat
Construction Spawn a physics cart then use the physics gun to freeze it about 10cm off the ground.
Adding hoverballs Configure the hoverballs so that 9 is up and 6 is down. Spawn 1 hoverball at each corner of the physics cart.
Thrusters Set the thrusters so that 8 pushes and 2 pulls and so that the force is 500 with no effect, use the generic thruster model. Place 2 thrusters on the 'wall' of the tray on the physics cart opposite the open end (Make sure they are symmetrically placed as this will provide forward and reverse thrust. This is now the rear side of the cart, the open end is the front, you can work out left and right (I hope!)
Set the thrusters so that 1 pushes and 3 pulls, same force and model. Place one thruster on the rear left wheel and another on the front right. Now reverse the keys (1 pulls and 3 pushes). Place one thruster on the front left wheel and another on the rear right wheel.
Optional Place the Jeep seat so that it is lying sideways on the ground, now easy-weld it to the upward facing portion of the tray facing to the front.
Unfreeze Don't forget to unfreeze the physics cart or you won't be going anywhere fast!
Time to fly! Jump into the physics cart (Sit on the seat if you are using it). Controls are: 9 = up, 6 = down, 1 = yaw left, 3 = yaw right, 8 = forward thrust, 2 = reverse thrust. Enjoy!
Airboat Transport Vehicle
| Air Vehicles: Airboat Transport Vehicle |
| An airboat... that flies and steers! | |
| Primus | |
| | 10/03/10 |
| | - |
Requirements: You should have them all.
Construction: 1. Spawn an Airboat vehicle. 2. Attach hoverballs to the front and back of each float. 3. Attach three thrusters (canister preferred) to the back. 4. Attach one thruster to the front side of both floats, and make sure push and pull are reversed on both sides.
Instructions: Relatively easy to fly, but first: -Sit firmly in Airboat. -Ascend using hoverballs. -Use back thrusters for forward/backward and side thrusters for turning.
Hoverboard V2
| Air Vehicles: Hoverboard V2 |
| A hovering board that can move forward slowly or fastly, depending on the number of thrusters | |
| marioguy2600 | |
| | Version 1: 10/11/10 - Version 2: 12/08/10 |
| | For use with Gmod 8, 9 and 10 only |
Requirements: You should have all the needed tools in the spawn menu.
Construction 1.) Spawn any medium sized door from "Useful Construction Props". 2.) Lift and freeze the door in the air. 3.) Take out the Hoverball Tool Gun and shoot a hoverball at each corner of the door. 4.) Take out the Thruster Tool Gun and shoot however many thrusters you want on a side, rowed up and linked. 5.) Unfreeze the door and drop it on the ground, making it ready for testing or riding.
Instructions These are really simple, 1.) Stand on the flat side of the bookshelf 2.) Press the upward hoverball key. (Normal key is 8) 3.) To move forward, press the Thruster forward key. (Normal key is 7)
Extras The Crazy Surfboard: To transform your hoverboard into a crazy surfboard, remove all hoverballs and weld a Jeep seat onto the board. Steering Upgrade: To upgrade the hoverboard to steer, change the keys to the thrusters once for the left side, then put some thurusters there, then changes the thruster keys one more time for the right side. To make steering look natural, use the Fade Fast paint effect on the side thrusters with the Color Tool Gun. The Hovering War Turret : To make the best war machine that flys, weld 1-3 npc turrets on the board. (This should kill all NPCs that stand in your bloody path)
Decoration You can use a lot of tool guns to decorate the board, use the balloon tool gun to create balloons with a force of 0, use the color tool gun to color the board, attach small, light objects from other games underneath the board with ropes, and write a title for your board on the front with a sign (Ex. Zombie Killing Flying Platform, HEV BOARD, Sandvich Dispencer, Companion Cube's hovering bed, etc.).
Help The hoverboard is easy to build, but if you need help, contact me at [email protected]
Airboat Spacecraft
| Air Vehicles: Airboat Spacecraft |
| An Airboat with some hover balls and 2 turrets. | |
| GotterakaThing | |
| | 7/4/11 |
| | I have a sneaking suspicion that someone may have discovered it before me. |
Items Needed 1 Airboat 4 Hoverballs 2 Turrets
Steps 1. Get the Airboat. It does not matter if you freeze it or not.
2. Place the Hoverballs on each corner of the airboat. Set them to go up by pushing 8 and go down by pushing 2.
3. Add turrets to the frontlights. Do not change the button for turrets.
4. Have fun killing those below you!
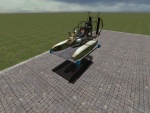
Airboat Harrier
| Air Vehicles: Airboat Harrier |
| A simple vehicle that functions like a harrier. | |
| Tex | |
| | 9/15/11 |
| | Easy to make |
Items Needed -Props- 1 Airboat 1 PHX Fighter Jet prop 4 Thrusters 2 PHX wings 2 PHX MK82 Bomb props -Tools- Weight tool Fin tool A brain
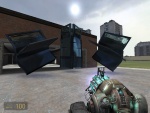
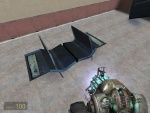
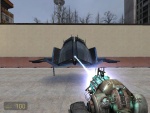
Steps 1. Spawn all the props listed above.
2. Weld the wings onto the airboat and no-collide both the wings and the airboat.
3. Place the jet in the airboat so you appear to be in it whilst in the airboat.
4. Weld it to the airboat.
5. Set the wings up as fins.
6. Place the thrusters, 1 on the tip of each wing, 1 on the nose of the jet, and 1 one the tail of the jet. Each should face down.
7. Make the MK82s prop spawners.
8. Weld the MK82s onto the wings of the Fighter Jet prop and no-collide them.
9. Set the weight of them to 10.
10. Color the thrusters, wing props, and airboat invisible.
11. Hop in and start dropping bombs!
